Lets you create, delete, and edit namespaces.
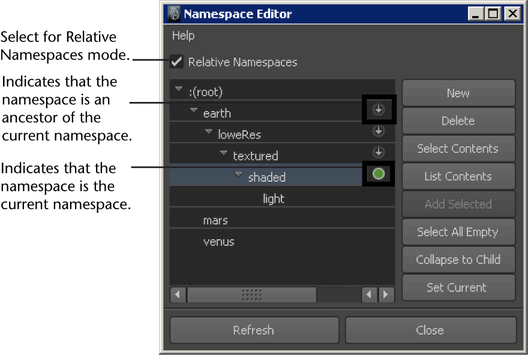
The displays all the current namespaces, including nested namespaces, in your scene. The root namespace is denoted with ":(root)"
.
Outline
| To... |
Do this |
| Create a new namespace |
Click . The currently selected namespace is extended with a new child namespace.
|
| Rename an existing namespace |
Double-click the namespace. In the Rename Namespace window, type a new name, and click . The new namespace name is applied to the target namespace and its descendants.
|
| Set mode so that you can refer to namespaces relative to the current namespace
|
Turn on .
|
| Delete a namespace |
Select a namespace and click . You cannot delete a namespace if it has associated child namespaces.
|
| Select the scene objects contained in a namespace |
Select a namespace and click .
|
| List the scene objects contained in a namespace |
Select a namespace and click the . The appears listing the namespace contents. The contents list is also displayed in the .
|
| Add selected scene objects to a namespace |
In the scene, select the objects you want to add. In the , select the namespace you want to add the objects to and click .
|
| Locate unused namespaces |
Click . All of the unused namespaces are selected in the .
|
| Remove empty parent namespaces |
Select a child namespace and click . Empty parent namespaces of the selected child namespace are removed from the namespace hierarchy.
|
| Set the current namespace |
Select the namespace you want to set as the current namespace, and then click . A  icon indicates the currently set namespace. icon indicates the currently set namespace.
|