


There may be situations where you need to remove nodes from a particular namespace and subsequently remove the reserved namespace from the scene. These situations might be as follows:
You can remove namespaces using the Namespace Editor or by using a namespace MEL command.
Remove namespaces using the Namespace Editor
The namespace for the object/node appears highlighted in the Channel Box and Outliner. For example, an object’s name with an assigned namespace can appear as follows:
spaceJunk:pSphere1
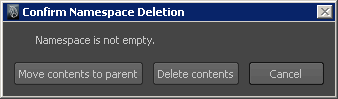
If the namespace you want to remove contains nodes, the Confirm Namespace Deletion window appears.
Remove namespaces using MEL commands
The next two procedures show you how to remove nodes from an existing namespace in a scene, and then remove the reserved namespace from the scene using the namespace MEL command.
To remove a specified namespace for all nodes in a scene
The namespace for the object/node appears in the Channel Box, Outliner, or other editor when it is selected. An object’s name with an assigned namespace would appear as follows:
spaceJunk:pSphere1
namespace -mv “spaceJunk” “:” -f
Any nodes that had the spaceJunk namespace now have no namespace specified. That is, the : specifies the default namespace and the -f flag forces the command even if it produces naming conflicts. As a result, nodes with identical names will be assigned an incremental number.
To remove a reserved namespace, you must first ensure that no nodes in the scene currently reside within that namespace. For more information, see the above procedure.
To remove a reserved namespace from a file
namespace -rm “spaceJunk”