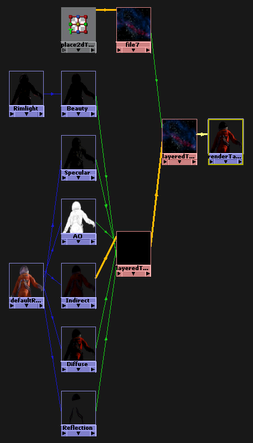
You can also add a background to your re-combination.
Creating a File node to add as a background to your re-combination
 layeredTexture1 to the Alpha attribute of its corresponding layer in layeredTexture2 to connect the alpha attributes.
 button in the Render View toolbar should be locked for this workflow because you are only working with the compositing graph and not making a change
to the scene. Unlocking the
button in the Render View toolbar should be locked for this workflow because you are only working with the compositing graph and not making a change
to the scene. Unlocking the  button causes all passes and layers that are upstream of the render target to be re-rendered, which unnecessarily increases
rendering times in this case.
button causes all passes and layers that are upstream of the render target to be re-rendered, which unnecessarily increases
rendering times in this case.
 .
.
The Render Target is rendered as follows.