Applying color correction to your re-combination


You can apply color correction to your re-combination. For example, in this scene, you may want the specular highlights to be more blue to match the bluish background. You can use the Gamma Correct node to apply color correction.

  1. In the Hypershade, select Maya > Utilities > Gamma Correct. Double-click the node to see it in the Attribute Editor.
  2. the Specular pass node into the Value attribute of the Gamma Correct node.
  3. In the Hypershade, double-click the connection line between the Specular pass node and the layeredTexture1 node. The Connection Editor appears.

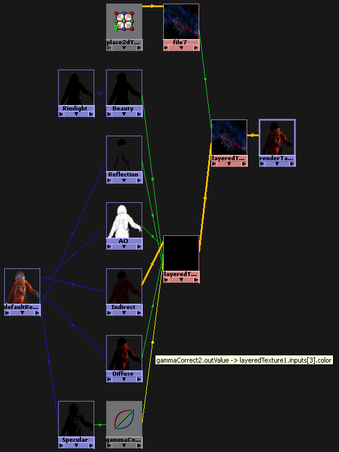
    The Specular pass outColor should be connected to one of the inputs of layeredTexture1. Take note of this input, for example inputs[3].color.

  4. Connect the Gamma Correct node in place of the Specular pass node to the layeredTexture1 node. In other words, connect the Gamma Correct node outValue output to the inputs[x].color input of layeredTexture1.
  5. In the Gamma Correct node Attribute Editor, increase the B (blue) value of Gamma to 1.5, for example, so the results appear more blue.
  6. In the Render View, select Render Target > renderTarget1.
  7. Click .

The Render Target is rendered as follows:

The specular highlights appear more blue and match the background.