You can control which areas of a mesh are influenced by dual quaternion skinning and which areas are influenced by classic linear skinning.
Setting the Weight Type to DQ Blend Weight in the Paint Skin Weights Tool lets you paint a weight map of the blend between classic linear and dual quaternion skinning modes, on a per vertex basis. The vertices are blended together in a linear fashion in world space.
To paint a blended skinning weight map
You can set the Skinning Method in the Smooth Bind Options as you bind the skin, or in the skinCluster if the skin is already bound. See Bind smooth skin.
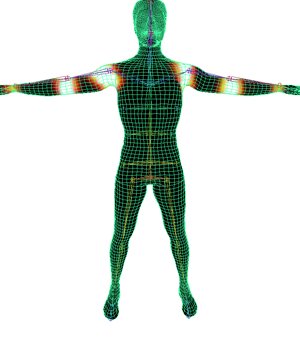
The following example image displays weights using one of the default Color presets in the Interactive Skin Binding Tool.

White areas indicate vertices with weight values of 1, meaning their influences have a fully dual quaternion affect. In these areas, volume is preserved as you rotate the influence. Yellow, orange, and red areas indicate vertices with weight values of less than one, so the influence will have a blend of dual quaternion and linear skinning and some volume loss can occur. Black areas of the mesh indicate that vertices have weight values of 0, meaning their influences are set to full classic linear skinning.
As you rotate or twist joints in areas where you painted fully dual quaternion weight values, volume is preserved in the mesh.