


Animating with the Channel Editor > Animation > Creating Animation Sequences Across
Nodes in Batch >
Linking Animation to Several Branches
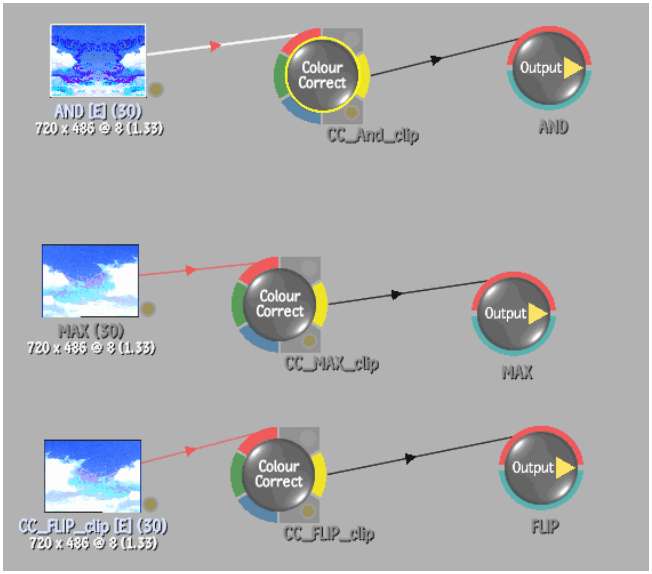
When you are working with the Batch timeline, you may want to apply the same effect to several segments in an assembled clip. The following procedure illustrates several Colour Correct nodes to which you can link animations. Using Copy and Link, you can link all colour correction channel animations from one Colour Correct node to other Colour Correct nodes.


To link colour correction animation to other Colour Corrector nodes:
In this example, three Colour Correct nodes are arranged each with its own output node for use in a complex effect where the sky sequences require the same animated colour effects at different points in the final clip.
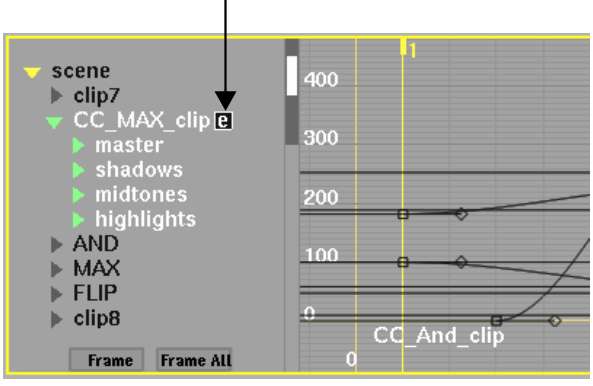
The letter e appears next to the second Colour Correct node indicating that an animation expression is applied to the entire node. All channel animations from the first Colour Correct node are applied to the second one.
The copied information is still contained on the clipboard and available for linking again.