


Modifying Timewarps with
the Timewarp Editor
Use the Timewarp Editor to add complex timing effects to a clip. For example, make the action in a clip accelerate, decelerate, or move in reverse by modifying the timing curve.
To access the Timewarp Editor:
Constant and Variable Timewarps
Constant timewarps have a continuous speed. In the Timewarp Editor, the timing curve for a constant timewarp is a straight line, containing one keyframe. When you modify the curve, the timewarp converts to a variable timewarp.
Constant timewarps can be edited by using the Speed field in the Timewarp menu.
Variable timewarps contain any number of keyframes. To edit the speed and curve of a variable timewarp, manipulate the speed channel. When you create a variable timewarp, a “*” appears in the timeline in place of the element's head and tail information.
Speed Curves and Timing Curves
Timewarps are created by modifying the timing of the source clip or by changing its playback speed. When you change a clip's timing, you are changing the time that it takes for a clip to reach a given frame. Take, for example, a 100-frame clip. You can adjust the timing so that only the 50th source frame is reached by the end of the clip's 100 frames. This effectively halves the clip's playback rate. A negative playback rate can be achieved by reversing a clip's timing curve (by changing the value at the last keyframe to the value of the first keyframe and the other way around).
In the Timing Curves window, a steeper timing curve results in a faster playback rate.


(a) Speed curve corresponding to a speed value of 100% (b) Timing curve corresponding to a speed value of 50%
Adjusting the clip's speed has different results. Setting the speed to 200% doubles the playback rate. A speed value of 50% plays the clip at half speed (or in slow motion). A negative speed value corresponds to playing the clip in reverse (where a -100% speed value creates a clip that plays back at the normal rate, but backward).
In the Timing Curves window, the speed curve and timing curve are, by definition, dependent on each other. You cannot change the speed without affecting the timing. Any action performed on one curve results in a corresponding action on the other. If you add a keyframe to the speed curve, a keyframe is automatically added to the timing curve at the same frame.
To modify a mixed frame timewarp with the Timewarp Editor:
 button to preview the result
of applying the timing curve to the source clip.
button to preview the result
of applying the timing curve to the source clip.
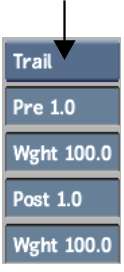
You can add a trail to the image that precedes and/or follows the moving object to increase the impression of speed:
The number of frames used in the mix is set with the pre trail and post trail timing curves. Since you can change the shape of the timing curves, the Trail values can be varied in the clip. When you use a pre trail or a post trail, the Mix value is not used.
Setting the Fall-off for the Trail
There is one Weight field for each Pre trail and Post trail option. The Weight field specifies the fall-off for the image trail:
To add a pre trail or a post trail to the image:
 button to preview the result
of applying the timing curve to the source clip.
button to preview the result
of applying the timing curve to the source clip.
Use the Desktop Timewarp Editor to set the following timewarp options.
Map Source button Determines which frame is displayed in the image window while in Source mode. The processed clip is not affected.
| Do this: | To: |
|---|---|
| Enable Map Source | Interpret the current frame number as a position in the result clip. The window zoom value is scaled to display the corresponding frame in the source clip. |
| Do not enable Map Source | Interpret the current frame number directly as the frame number in the source clip. |
Auto Key button Enable to set keyframes automatically each time a value is changed. Disable to set keyframes manually and then set the keyframes with the Set Key button in the Animation controls. For more information, see Accessing the Channel Editor.
Auto Scale button Automatically scales the timing curve to reflect changes to the timewarp duration.
Fit To Fill button If the source clip duration is shorter than the record clip duration, creates a fit-to-fill edit and the record clip is timewarped to fit the new duration. See Working with Implicit Timewarps in Batch.