You can avoid reprocessing the same nodes and clips as you navigate in the timebar by specifying which nodes and clips should be cached. Cached frames are stored on the system framestore, increasing system performance and efficiency. Stored cache clips are contained in a _Cache_ library and correspond to the clip IDs in the setups. These cache library files are named according to setup and project name.
Node and clip caching is enabled in the Cache menu. The Cache menu also displays the number of rendered frames in the cache for the selected nodes or clips, and the remaining space on the framestore.
Any clip node and Import node can be cached as long as it is edited, resized, or has had a LUT conversion applied. Batch setup files include the location of any cached frames, which are stored with the clip ID until removed. The history associated with a clip can also be cached, but not if the clip was rendered in Proxy mode.
Each node and clip has a cache tab on the lower-right corner.
The following steps are not required to actually cache frames. Typically, you use intelligent caching, which automatically caches frames as you move through the timebar. Caching occurs as the frame is displayed and the node operation is applied. A cached node automatically saves frames as you display—or visit—them and then reloads them each time you visit the frame again. Your workflow speed is increased.
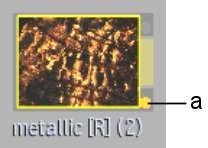
(a) Cache tab |
|
|
Read and write mode Cache enabled |
Read-only mode Frames already cached are accessible |
Cache disabled |
Click the cache tab to activate any of the following modes.
| Mode | Colour | Description |
|---|---|---|
| Disabled | Grey | Disables the cache. You can also Alt-click to disable and remove cached frames for the selected node. |
| Read and write | Yellow | Saves and loads data to and from the cache. |
| Read-only | Amber | Is shown with a yellow outline. No data can be saved to the cache, but rendered frames remain stored. Use this mode to prevent the framestore from getting full. |
Changing or cutting an input or any node further along the process tree that has cached frames clears the cache buffer. The Cache menu shows how many frames are cached for the selected node and the number of frames available on the framestore. This allows you to clear the cache of the selected node or all cached frames.


(a) Cached frame counter
The cached frames are stored in the framestore and added to the cached frame counter.
To turn off the cache and remove cached frames, Alt-click the cache indicator for the selected node.
Rendering Caches During Processing
You can render node caches while processing.
To render node caches while processing:

The clip is processed, and all node caches are rendered. While rendering, the message bar displays the number of frames in the node and the time remaining until the render is complete.