Set the following preferences for working with timewarps.


(a) Timewarp Render Mode box (b) Interpolation option box (c) Timewarp Sample box
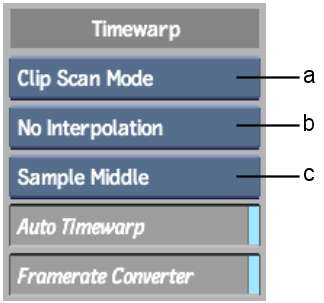
Timewarp Render Mode boxSet the render mode you want to use when you add a timewarp to a clip. You can select Interlaced, Progressive, or Clip Scan Mode. In Clip Scan Mode, Inferno automatically sets the render mode to that of the clip (either progressive or interlaced).
Interpolation option boxIf you create an interlaced timewarp, select from the following interpolation options.
| Select: | To: |
|---|---|
| No Interpolation | Create a timewarp with no field interpolation. |
| Half Interpolation | Create a timewarp in which interpolation only takes place on displaced fields. |
| Full Interpolation | Create a timewarp in which all fields are interpolated. Note that this option has the least aliasing, but you may notice some softening of the image due to the blending of the fields. |
| Shift Field Up | Shift the image up by a single line. This may help reduce artifacts that appear in reverse timewarps of 100%. |
| Shift Field Down | Shift the image down by a single line. This may help reduce artifacts that appear in reverse timewarps of 100%. |
Timewarp Sample boxSelect whether the sampling of the timewarp will be done at the beginning, middle, or end of the timing curve for each frame or field. You can also change the Timewarp Sample option in the Timewarp Editor to override the default.
| Select: | To sample the timewarp: |
|---|---|
| Sample Start | At the start of the frame. |
| Sample Middle | (Default) At the middle of the first frame. Generally, you should use this setting. Depending on the timewarp speed and how other editing systems create timewarps, you may need to change the sampling to fit what was done elsewhere. |
| Sample End | At the end of the frame. |
Auto Timewarp buttonThis option allows you to specify the behaviour of four-point replace and overwrite edits when they involve a differing number of frames between the in and out points on the source and record clips. These types of edits require that the record duration does not change.
Enable Auto Timewarp if you want to timewarp the inserted frames from the source clip. The actual frames between the in and out points on the source clip are used. See Working with Implicit Timewarps in Batch.
Disable Auto Timewarp if you want excess source clip frames to be added to the edit as tail frames. The source clip selection begins at the in point, but if the length of the source selection exceeds the record selection, excess frames at the end of the source selection are not used. Instead, the excess frames are added as tail frames. If the length of the source selection is less than the record selection, the source selection overwrites the equivalent number of frames in the record clip. Essentially, a four-point edit is treated as a three-point edit.
Auto Timewarp is enabled by default.
Framerate Converter buttonEnable to format the source clip to the correct destination framerate by applying a video timewarp to the source clip.


