Use the MBlend node to set up the matte operations you want to perform on a clip.
Use the Front pipe of a layer to define the matte, and use the Matte pipe to isolate an area where you want the matte to be applied. For example, use the Matte pipe to isolate an area of the key-in clip and apply a different matte to that area.
When there are no nodes on the Matte pipe, the matte is applied to the entire image.
As with the CBlend node, you can blend the front and back images for each layer and create several layers of mattes.
The Front and Matte pipes of the MBlend node are both designed to result in a matte. This is represented visually by a blue box at the right of the Front and Matte pipes. You can place any node on the Front and Matte pipes that results in a matte, including the 3D Keyer, MasterK, 2D Histogram, GMask, Edge and Degrain nodes.
The Front and Matte pipes of the MBlend node constitute one layer.


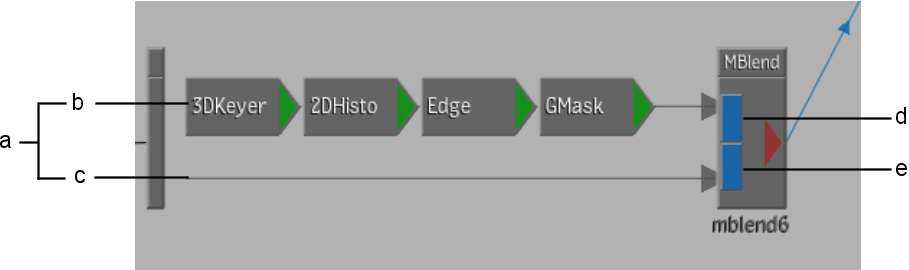
(a) One layer (b) Front pipe (c) Matte pipe (d) Blue box of Front pipe (e) Blue box of Matte pipe
The two pipes together, along with a back component, constitute one layer. For the first (bottom) layer, the MBlend node uses a pure black image for the back component. To learn how subsequent layers are composited, see Using Several Layers in a Blend Node.


