Use the Blend controls in the Keyer or Colour menu to blend the front and back clip in any key you create except a luminance key. The Blend controls change the blending that occurs at the edges of the key but should not greatly affect the black and white areas of the key. You can sample the colour you want to remove, and then adjust the Edge Balance trackball and Blend controls to emphasize the front or back clip at the edges of the key.


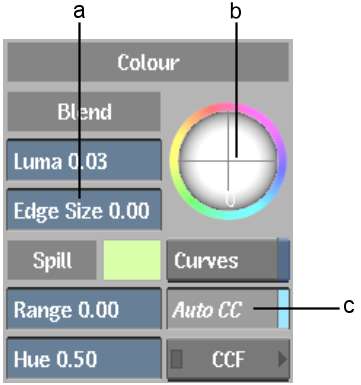
(a) Edge Balance trackball (b) Blend controls (c) Auto CC button in Range menu
To adjust the edge of the key and blend the front and back clips:
| Adjust: | To: |
|---|---|
| Luma | Darken or lighten the edge of the key. Blend Luma only affects the luma of the edge. |
| Edge Size | Set the range for the blend. Drag right to soften the edge and blend further into the key. Drag left to harden, or create a thinner, edge. Blend Edge Size affects both Blend Luma and Edge Balance. |
| Edge Balance trackball | Add a cast to the edge of the key and improve the overall look by matching the edge with a colour cast in the back clip. Drag the Edge Balance trackball toward the colour you want to add. The Edge Balance trackball only affects the chroma of the edge. |


