Use the Stabilizer controls
in the Warp menu or in the Morph menu to select the clip you want
to track, the spline you want to apply the tracking data to, and
the tracking mode (Axis or Shape). See
Stabilizing.
| Select from the Track Clip box: |
To track: |
| Input1 |
The Input1 clip. |
| Input2 |
The Input2 clip. |
| Matte1 |
The Matte1 clip. |
| Matte2 |
The Matte2 clip. |
| Background |
The background clip. |
Tracking by Axis
To
make the spline follow the movement in the clip without changing
shape, apply the tracking data to the spline's axis.
To track by axis:
- Set the Stabilizer controls to apply
the tracking data to either the source (Src) or destination (Dst)
spline for either the Input1 or Input2 clip. Select the Axis node
in the Distort schematic that is the parent of the spline you want
to track.
- Select the clip you want to track from
the Track Clip box.
- Click Track Axis.
The Stabilizer menu appears.
- Position the tracker on the image. Tracker
1 controls the position. Tracker 2 controls the rotation or scale.
See
Working with Trackers.
- To use two trackers, click Tracker 2,
click Active, and position the second tracker on the image.
- Click Analyse to generate the tracking
data.
- If necessary, fine-tune the analysis.
- When you are satisfied with the tracking
results, click Return to apply the results to the axis and return
to Distort.
Tracking by Vertices
To
make the spline follow the movement and shape change in the clip,
apply the tracking data to the spline's vertices.
To track by vertices:
- Select the spline's vertices that you
want to affect. You can first select a spline by clicking its Spline
node in the Distort schematic.
TipDouble-clicking a
Spline node displays the Warp or Morph menu.
- Set the Stabilizer controls to apply
the tracking data to either the source (Src) or destination (Dst)
spline for either the Input1 or Input2 clip.
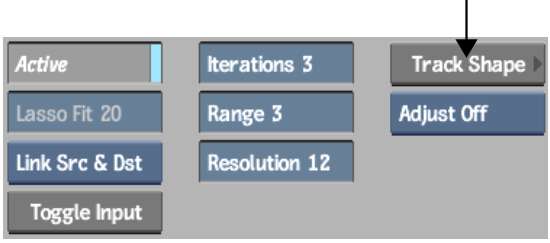
- Click Track Shape.
The Stabilizer menu appears.
A tracker appears on each vertex that you selected. The reference
frame is the frame from which you opened the Stabilizer.
- If necessary, adjust the position of
the trackers to ensure that each tracker has a good reference point.
- Click Analyse to generate the tracking
data, and if necessary, fine-tune the analysis.
For example, disable
a problem tracker and re-analyse, as described in
Tracking Difficult Shots and Correcting Errors.
- When you are satisfied with the tracking
results, click Return to apply the results and return to Distort.
Copying and Pasting Tracking
Data
You can copy and paste
tracking data from one mesh to another using the Channel Editor.
For example, if tracking was done using Axis, you can copy the translation
of the Input1 source spline and apply it to the Input2 source spline.
Example: To copy translation data:
- Click Animation to display the Channel
Editor.
- Select the X and Y channels in the Input1
_src translate folder.
- Click Copy.
- Select the X and Y channels in the Input1_dst
translate folder.
- Click Paste.
The translation channels
containing the tracking data from the Input1 source spline are pasted
into the Input1 destination spline.