Creating a cutout is
similar to creating a graphic. In the CutOut menu, you use the same
controls as you would in the Graphics menu to select, copy, hide,
move, rotate, resize, delete, store, recall, push, and tack cutouts.
To create a cutout:
- Click CutOut.
- Click Add.
The CutOut Shadow options
appear.
- To limit the area of the cutout with
a matte, enable Use in the Matte controls.
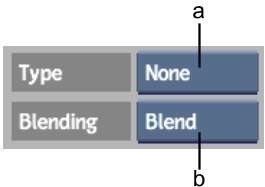
- Select an option from the Shadow Type
box.
The Shadow Type box determines
how the cutout will be pasted onto the result clip. See
Pasting Cutouts.
- Click Attributes.
- To create a cutout that spans the entire
clip, enable Sequence.
- Click one of the four Cutout commands.
See
Using the Cutout Commands.
NoteTo use the GeoCut
option, select all the objects you want to use in the cutout in
the Graphics menu before clicking the GeoCut button.
- Draw the cutout on the image.
- Set the resolution to be used when updating
the object.
The object appears at
full resolution when it is drawn. See
Setting the Object Resolution and Display.
- Set the cutout's position using the transformation
box or controls.
- Set the cutout's colour using the Current
Colour pot.
- Click Tack to permanently place the object
on the result clip.
Once the object is tacked
down, it cannot be moved, rotated, deleted, resized, or copied.