When you make changes to a clip's timing, you are changing the time that it takes for a clip to reach a given frame. Take, for example, a 100-frame clip. You could adjust the timing so that only the 50th source frame is reached by the end of the clip's 100 frames. This effectively halves the clip's playback rate. A negative playback rate can be achieved by reversing a clip's timing curve (by changing the value at the last keyframe to the value of the first keyframe and the other way around).
A steeper timing curve results in a faster playback rate.


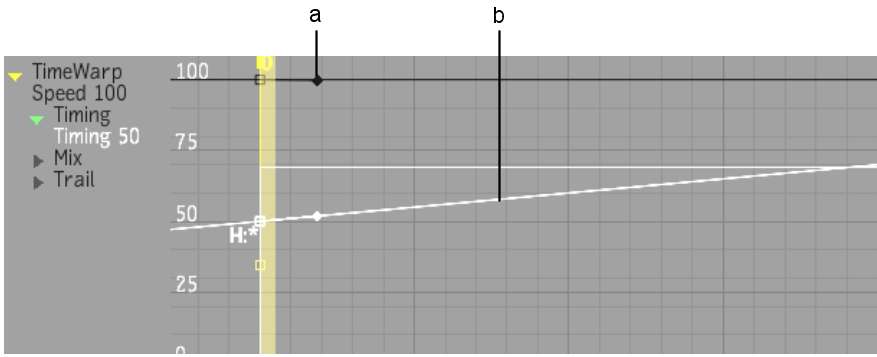
(a) Speed curve corresponding to a speed value of 100% (b) Timing curve corresponding to a speed value of 50%
Adjusting the clip's speed has a different result. Setting the speed to 200% doubles the playback rate. A speed value of 50% plays the clip at half speed (or in slow motion). A negative speed value corresponds to playing the clip in reverse (where a -100% speed value creates a clip that plays at the normal rate, but backward).
In the Channel Editor, you can see that the speed curve and timing curve are, by definition, dependent on each other. You cannot change the speed without affecting the timing. Any action performed on one curve results in a corresponding action on the other. If you add a keyframe to the speed curve, then a keyframe is automatically added to the timing curve at the same frame.
To lengthen a clip using a timewarp:
In the Channel Editor, a white Trim box appears to denote the limits of the selected element. Head and tail frames appear outside the Trim box.
The timeline appears with the timewarp selected. The timewarp has new tail frames as defined by your changes to the Timing channel.


