You can group nodes to simplify cluttered schematics. A group is represented by a single dynamic node that displays the group’s contents, inputs, and outputs. You can use a group node as a parent to, or child of, other clips and nodes.
You can create several groups and work on each group separately. For example, group a Keying and Colour Correction branch separately from an Action and a filtering branch, and then work on each branch independently. If you need to edit the nodes in a group, you can expand the group and make the necessary modifications.


The selected nodes collapse into a Group node. The Group node lists the nodes contained in the group, as well as the non-hidden input tabs and output tabs.
![]()
(a) Input connection (b) Proxy node (c) Output connections (d) Group icon

Defining Group Display Settings
Customize the group node using the Group List menu. The Group List menu lists all the nodes and connections contained in a group. You can rename and hide the contents of the group, as well as define which input and output connection sockets are visible and available for connection in the schematic.
You can select a node in the Group List menu to display the group at the selected node's stage. The View box must be set to Result, Front, or Back to use this display option. You can also display a preview proxy of a node in the group.
To define a group's display settings:
![]()
(a) Sort Order buttons (b) Enabled icon visibility (c) Disabled UI visibility (d) Enabled input visibility (e) Enabled output visibility
| Click: | To: |
|---|---|
| Sort Order buttons | Move the selected node one position up or down (click the single-arrow buttons). To move the selected node to the first or last position in a group, click the arrow-line buttons. |
| Name | Change the node's name. |
| Icon | Toggle the node's visibility in the group. Icons in the Group List are yellow when the node is visible and grey when hidden. |
| UI | Toggle the node's availability in the Node List box. Icons in the Group List are yellow when the node is displayed in the box and grey when hidden. |
| Proxy | Lock the proxy displayed in the group icon so that it does not change as you navigate the Group List. Icons in the Proxy list are white when locked and grey when unlocked. |
| Inputs | Hide or unhide the selected node's input sockets. Sockets are colour-coded with the same scheme as Batch nodes that are not part of a group. Icons in the Group List have a yellow border when the input socket is visible. |
| Outputs | Hide or unhide the selected node's output sockets. Sockets are colour-coded with the same scheme as Batch nodes that are not part of a group. Icons in the Group List have a yellow border when the output socket is visible. |
| Node Proxy | Display a preview proxy of a node in the group. To change the proxy that is displayed, press the Shift + up or down arrow as you navigate through the Group List. |
| Collapsed | Collapse the group icon so that only the preview proxy is visible. |
Use the Edit Group controls to edit the contents of a group.
The nodes in the group appear in their own schematic.
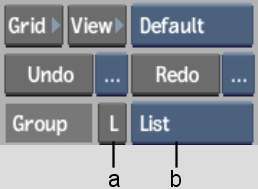
(a) List button (b) Node List box
A node's bit depth and resolution are not always compatible. It is not always possible to use clips of different resolution or bit depth. For example, it is not possible to have one custom Colour Corrector node with an 8-bit clip and another with a 12-bit clip. Garbage masks, on the other hand, work correctly with clips of different bit depth, but not of different resolutions.


