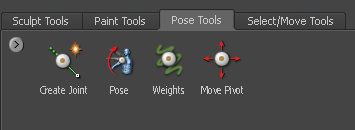
You can transform, scale, and deform models and components of models in a variety of ways using the pose tools located in the Pose Tools tray.
For example, if you are working with a character model you can use the posing features to place it in various types of positions and stances as well use the posing tools to deform components or change their proportions. Non-character models can be deformed and shaped just as easily by moving, bending, or twisting their components as well.
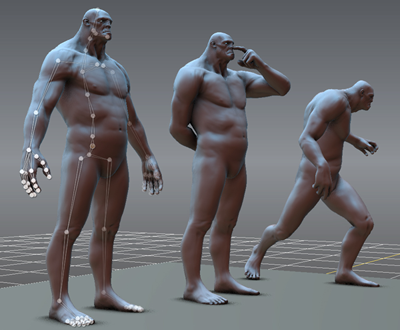
Models with skeletons rigged using other 3D applications such as Maya, 3ds Max, and Softimage can be imported to Mudbox using the FBX file format and then posed in Mudbox for a variety of purposes. For example; to perform range of motion tests to determine whether the proportions of the arms on the model allow the fingers to reach the character’s face, and so on.
The fundamental component for posing a model in Mudbox is the joint. A joint is an item you place on a model to rotate, transform (and otherwise deform) neighboring components that you specify (arm, foot, leg, and so on). Much like a knee joint rotates to move the associated components of the lower leg (shin, foot, and toes), joints can be placed on a model to articulate it into a desired pose. That is, the individual vertices associated with a joint (with their associated faces) are moved as one combined unit or set.
When you create a joint, Mudbox will attempt to center it in the volume based on the location it is placed. This makes it a quick and easy process for positioning a joint from any vantage point within the 3D View and provides an initially good default placement in most situations. Joints can also be repositioned after their creation to provide a better deformation of the vertices.
Joints automatically have a user-specified region of influence (weighting) that determines how much or how little of the surrounding vertices on the model are affected whenever the associated model component is rotated or transformed about the joint. The region of influence usually diminishes or falls off with distance across the joint.
When you create a joint, a default region of influence or weighting is created. Its default size is determined by how far the Joint Vector is dragged away from the joint’s creation position. After releasing the mouse/stylus button, the region of influence is highlighted in a bright green color that diminishes with distance from the joint based on the falloff curve property that can be set prior to using the Create Joint tool.
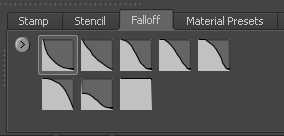
The falloff curve must be selected prior to joint creation from a set of presets in the Falloff tray. Otherwise, the falloff can be customized using the Weights tool. For more information, see Adjusting tool falloff.
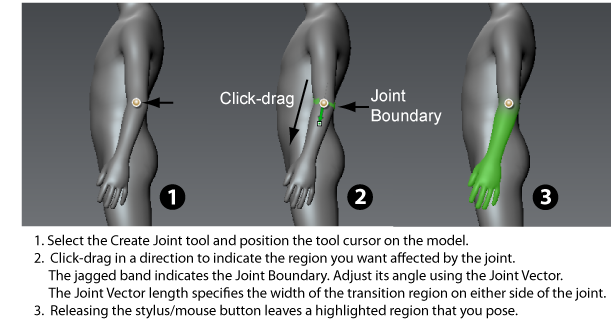
Dragging the Joint Vector when a joint is created also sets the Joint Boundary (indicated by a highlighted ring of faces around the component) where the region of influence begins in relation to the joint. The region of influence is balanced on either side of the joint and determines how the deformations occur in relation to it. You can interactively set this boundary so that its lies perpendicular or at an angle in relation to the model component.
When the mouse/stylus is released, the region of the model affected by the joint is highlighted in green. This region is the component that moves, rotates or scales when you use the Pose tool. This highlighted region is known as the Weighted Region. To pose all of the model except the Weighted Region, press the Ctrl key while using the Pose tool.
You can pose a joint you’ve created in Mudbox or joints that have been imported with a model you’ve imported. The current camera position plays an important role on the outcome of any pose operation. That is, all posing operations are performed in relation to it.
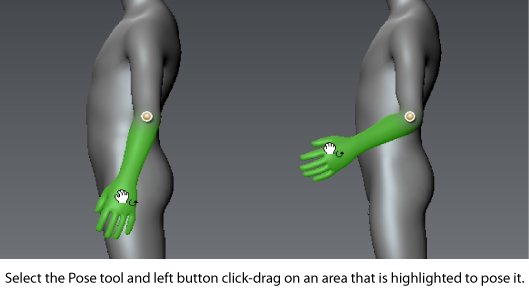
Click-dragging directly on a region that is highlighted using the left button causes the selected region to rotate in relation to a rotation axis that is normal to the current camera view.
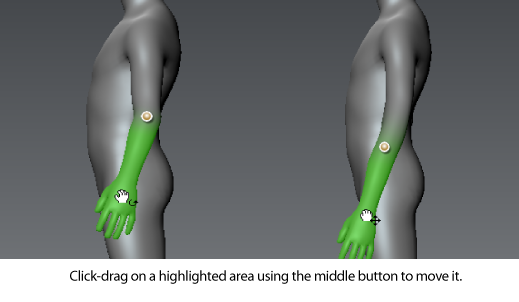
Click-dragging directly on a region that is highlighted using the middle button moves the highlighted region within the camera viewing plane.
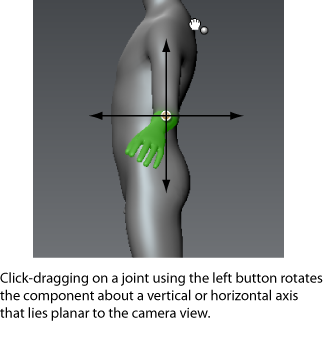
Click-dragging directly on a joint with the left button causes the selected region to rotate about vertical and horizontal axes that lie planar in relation to the current camera view.
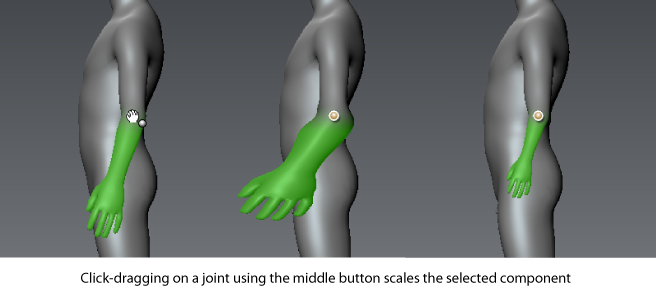
Click-dragging directly on the joint using the middle button scales the selected region non-proportionally, or proportionally when the Shift key is pressed.