There are two ways to
use the Shape Tracker. If you can create a large enough ROI around
the object you want to track, you can use the Shape Tracker to track
the object and then grade the same geometry. If the object you want
to track and grade is small and it does not have enough trackable
points to use the Shape Tracker effectively, you need to track a
larger ROI, create a graded geometry of the smaller object, and
link the ROI geometry to the graded geometry.
The following procedure
is used when the object has a large enough ROI to track.
To track an object within a shot:
- Make sure you are on the first frame
of where you want the tracking to start.
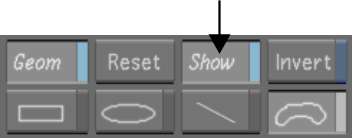
- In the Secondaries menu, right-click
a secondary layer to activate it.
- Click Show
- Enable the Shape Tracker tool by clicking
on Tracker and Shape.
- Create an ROI by drawing either a basic
or free-form geometry around the object you want to track. See
Drawing Basic Geometries and
Drawing Free-Form Geometries.
NoteMake sure your ROI
is as large as possible, without including too many non-rigid shapes,
in order to give Shape Tracker a sufficient area to analyse.
- Make sure the geometry you want to track
is selected.
The axis of the geometry
should be yellow.
- Set the tolerance slider between 0-10.
- Click the analyse backward, or analyse
forward button, to analyse the shot segment.
When the analysis is
complete, you can grade the geometry.
NoteIf the analysis stops
before the end of the shot or it does not begin at all, the ROI
area may be too small to track. Refer to the following procedure
below.
The following procedure
is used if the object you want to track is small and does not contain
enough trackable points.
To track a small object that does not
contain enough trackable points:
- Make sure you are on the first frame
of where you want the tracking to start.
- In the Secondaries menu, right-click
a secondary layer button to activate it.
- Click Show.
- Enable the Shape Tracker tool by clicking
on Tracker and Shape.
- Create an ROI by drawing a basic geometry
around a large area in the shot. See
Drawing Basic Geometries.
NoteDepending upon your
shot, the large ROI area may or may not contain the smaller object
you want to track.
- Make sure the geometry you want to track
is selected.
The axis of the geometry
should be yellow.
- Set the tolerance slider between 0-10.
- Click the analyse backward, or analyse
forward button, to analyse the shot segment.
The analysis is now complete.
- Click Hide.
The tracked geometry
is now hidden.
- Create a geometry around the object you
want to grade.
- Grade this new geometry.
- Press ~ (the tilde key) to enter the
Schematic view.
You should see the axis
and geometry of the tracked shape and the graded shape.
- Position your cursor over the edge of
the circle representing the ROI axis and left-click and drag a line
to the edge of the circle representing the graded shape axis.
The graded shape is now
linked to the ROI and therefore follows its tracked path.
- Press ~ to return to the Player view.