Setting a Project's Home Directory
When you create a project, a project home directory is created on the system disk in the /usr/discreet/project/ directory. File-based resources such as effects setups, EDLs, and LUTs are usually managed in a set of subdirectories in this home directory, by module.
For example, when you save a LUT, the file browser opens, by default, to a subdirectory of the project home directory for storing LUTs. You are not obliged to save LUTs in this directory, but doing so can help you better manage the resources you need by saving them to a consistent location. Similarly, when you load a LUT, the file browser opens, by default, to the same directory. For details on saving and loading resource such as LUTs, preferences, and setups, see Saving Setups and Preferences.
You are not restricted to these directories when you load or save setups. You can use the file browser to locate a different directory, or use project shortcuts to browse the setup directories of other projects on the same system.
When you create a project, the project's home directory path appears in the Setup Directory box.


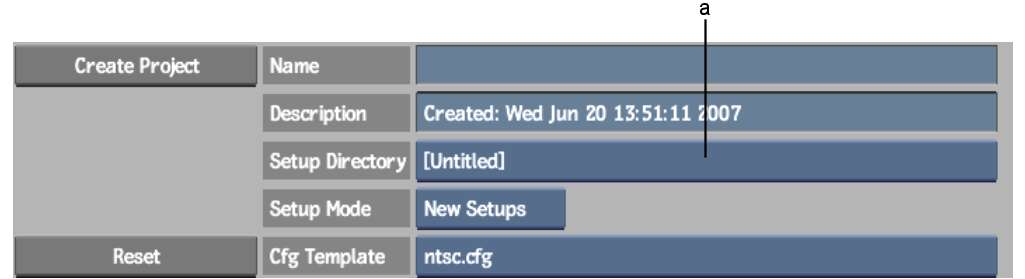
(a) Setup Directory box
You have two options, however, that override the default home directory:
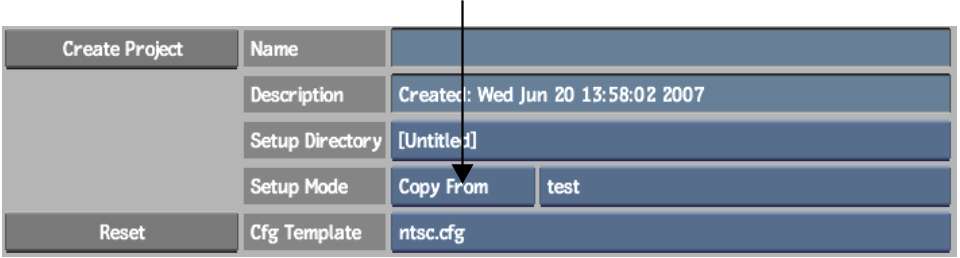
You can also copy the setups of another project into the subdirectories of the project you are creating.
To share the project home directory with an existing project:
Any setups already saved to the existing project are made available to the new project.
To create a custom path for the project's home directory:
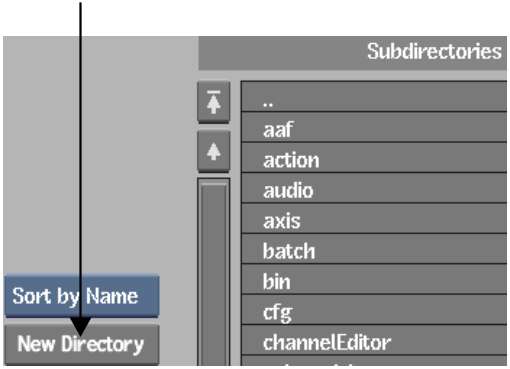
If the directory is not created, you may not have the access privileges to create directories in the current location.
The new directory name appears in the Setup Directory box of the Create Project menu.
To copy setups from an existing project: