Proxies
are low-resolution copies of high-resolution images, one for each
frame. Set proxy management options to specify how and when proxies
are generated for clips used in the project.
To set proxy management options:
- From the Proxy Management option box,
select an option.
TipTo change proxy management
options for a current project, you must access the Project Management
menu from the Preferences menu.
| Select: |
To store: |
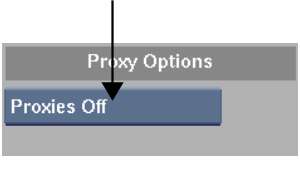
| Proxies Off |
No proxies, no matter what resolution clips you work
with.
|
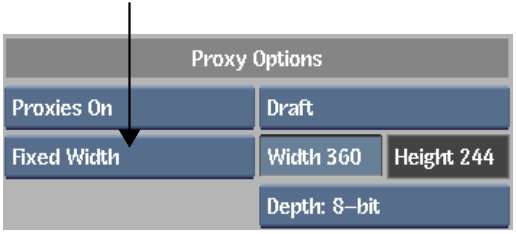
| Proxies On |
Proxies for all clips larger than the proxy width you
set for all proxies.
|
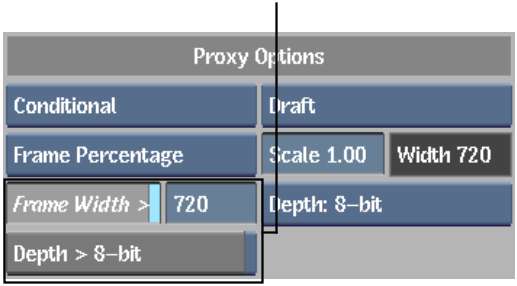
| Conditional |
Proxies only for clips that meet conditional criteria,
for example, clips that exceed a width of 1000 pixels.
|
- If you selected Proxies On or Conditional,
specify the proxy size by doing one of the following:
- Select Fixed Width from the Proxy Size
box and then enter a value in the Proxy Width field beside the Proxy
Size box. For example, enter 720 to create and store proxies 720
pixels wide. Proxy height is determined by the clip's aspect ratio,
relative to the proxy width that you set.
TipWhen the proxy and
full resolution clip have the same bit depth, proxies are not stored
for clips that are the same width as the proxy width. For example,
if you set proxy width to 720, your project will not store proxies
for NTSC clips (720x486). If the bit depth of the full resolution
clip is greater than that of the proxy, proxies are stored for clips
with the same width as the proxy.
- Select Frame Percentage from the Proxy
Size box and then enter a value in the Scale field. For example,
enter 0.50 to create and store proxies that are 50% of the clip
resolution.
Proxies always have the
same aspect ratio as the full-resolution clip. The width of proxies
for clips with the default resolution corresponding to the scale
value you set is displayed in the Width field.
- If you selected Proxies Conditional,
set your conditional criteria.
- To store proxies for all clips of a certain
width and greater, enable Frame Width > and then enter a value
in the adjacent field. For example, enter 1000 to store proxies
for all clips wider than 1000 pixels.
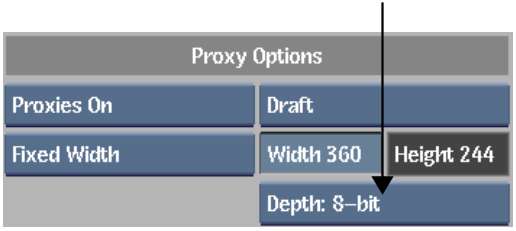
- To store proxies only for 10-bit, 12-bit,
or 12-bit unpacked clips, enable Depth > 8-bit.
NoteThese two settings
are not mutually exclusive. For example, if you enter a value of
1000 in the Frame Width field and enable Depth > 8-bit, a 12-bit
clip with a width of 720 will get proxies as long as the project proxy
width is less than 720.
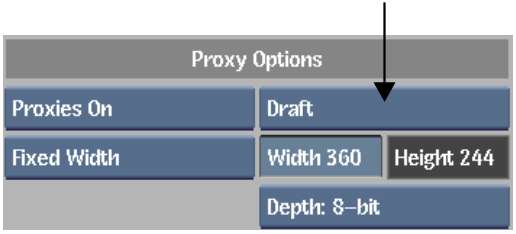
- From the Proxy Quality box, set the
quality of the proxy image for viewing purposes.
Proxy quality affects
processing and proxy generation duration since lower qualities are
faster to calculate. However, the quality does not affect the amount
of framestore space required for proxies.
| Select: |
To specify: |
| Draft |
The lowest possible quality. This is the quality used
when proxies are generated automatically following video I/O.
|
| Coarse |
The next highest quality after Draft. |
| Medium |
The next highest quality after Coarse. |
| Quality |
The next highest quality after Medium. |
| Bicubic |
The highest possible quality. |
- From the Proxy Bit Depth box, select
the bit depth for proxies.
| Select: |
To set: |
| Depth: 8-bit |
The proxy bit depth to 8 bits. |
| Depth: Full Res |
The proxy bit depth to be the same bit depth as that
of the clip.
|