You can create multiple Source Areas to hold the clips that you use for each scene. You can also create multiple Record Areas to sort the multitrack clips you are editing. These areas can contain any number of clips. The number of clips they contain is indicated by the number to the right of the area name in the EditDesk Library.


By default, the EditDesk has one Source Area and one Record Area. When you capture clips from a VTR or another clip I/O device, you capture them to the current Source Area or to a clip library. To work with clips captured to a clip library, you must load them to the Source Area. Because the Source Area is the starting point for almost all the clips you work with, you often have to keep track of many sources in a single Source Area. Using the EditDesk Library, you can create multiple Source Areas and sort clips into them as needed. For example, you can separate sources according to the scenes in which they are used, or sort types of shots to make it easier to find what you want when you need a specific shot.
When the EditDesk Library contains multiple Source and Record Areas, you can sort clips in them gesturally.
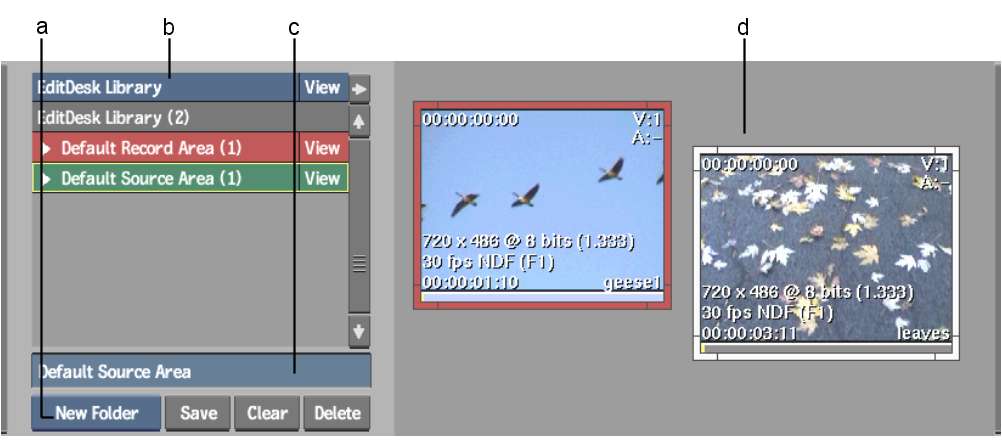
(a) New Entry box (b) EditDesk Library (c) Name box (d) Source Area
To create a Source or Record Area:
A new entry appears in the EditDesk Library. It is the current Source or Record Area, as indicated by a yellow border around the entry, and is empty.


