Relinking to File-based Media


After having edited sequences in your Avid application using file-based media, such as MXF files or QuickTime movies, you can relink the exported AAF to these files in Backdraft Conform.

Verify that the media files you are relinking to are supported in Backdraft Conform. See Import Formats.

You can relink imported AAF files to file-based video or audio media.

If you are importing an AAF file with Varicam support, it will be identified as such in the Source Type box.

To relink AAF to file-based media:

  1. Swipe to the right to display the List of Segments Referencing Files For Recapture table across the full screen.

    Show small imageShow large image

  2. Use the Search Criteria to find the source media files.

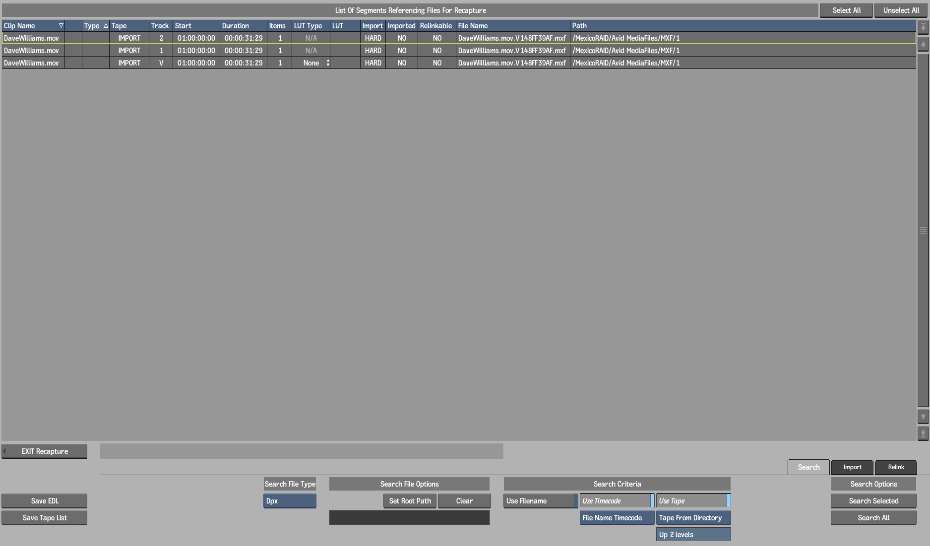
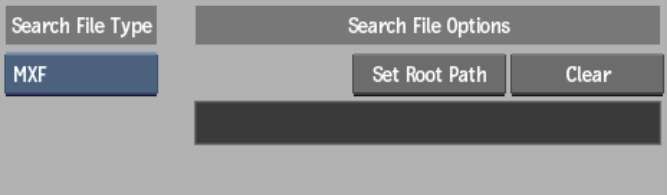
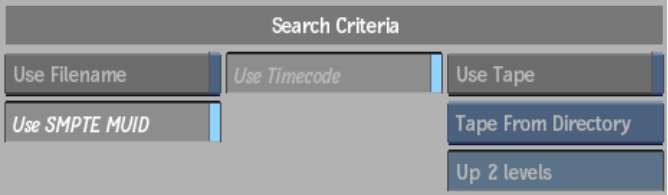
    When importing sequences (DPX) or streaming media (MXF, QT) that are referenced by AAF files, use the advanced Search feature to find and read these image sequences or streaming media, based on preset search rules and criteria. These media files are mostly arranged in hierarchical structures that can be identified and traversed through all the subdirectories from a given root destination. Providing additional criteria, such as file type, tape name, and timecode can help to narrow and pinpoint the search.

  3. From the Search File Type box, select the file type to search for.

    Show small imageShow large image

  4. Click Set Root Path to select the root directory where the search will start.
  5. Select the criteria that you want to match on.

    Show small imageShow large image

    Select To
    Use Filename Search for the exact file name referenced in the AAF.
    Use Timecode Read the metadata from found items to make sure that the starting timecode matches the one in the edit list. Select whether to read the timecode from the file header (MXF, QuickTime, and DPX) or from the file name (DPX only).
    Use Tape Read the metadata from found items to make sure that the tape name matches the one in the edit list. Select whether to read the tape name from the file header (MXF and QuickTime) or from the directory (DPX).
    Use SMPTE MUID Read the metadata from found items to make sure that the starting SMPTE MUID matches the one in the edit list. Use this option to relink to MXF files using the DNxHD codec.

    Using SMPTE MUID also disables the Use Filename and Use Tape options.

  6. Once all settings are made for the selected file type, click Search Selected or Search All.

    A progress bar appears.

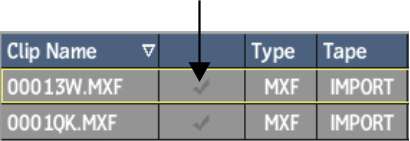
    The results update the List of Segments Referencing Files For Recapture table. A checkmark appears in the Full Res column for each clip when the full-resolution version of a file is found. The Type column lists the file type/extension. The Tape and Path columns are also updated.

    Show small imageShow large image

  7. If files are not found, you can redo the search by deselecting match criteria. You can also run the search for a different file type. Data for all the previously found files is kept.
  8. If the file search still does not find your media, you will have to enter the correct path names manually for each clip. To change the path, select the unfound media segments in the list, and then click the Path field.

    Show small imageShow large image

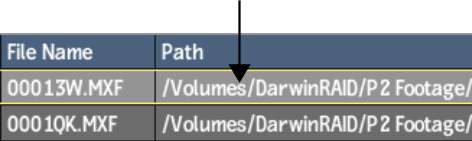
    This opens the library browser where you can choose a different path.

  9. If you want to soft-import the media files, click Select All or drag to select the segments in the list, and then, in the Import column, drag left or right to toggle between SOFT and HARD.

    Show small imageShow large image

    NoteNot all files can be soft-imported (for example, audio files at 44.1 kHz).
  10. Optional: If you want to apply a LUT or gamma correction to your media files, click Select All or drag to select the segments in the list, and then, from the LUT Type column, select an option.

    Show small imageShow large image

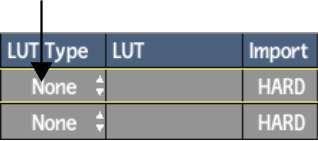
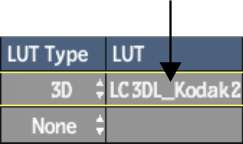
    If you selected 1D LUT or 3D LUT for LUT Type, click in the LUT column to choose a specific LUT name.

    Show small imageShow large image

    The LUT file name appears in the LUT column.

  11. Click the Import tab.

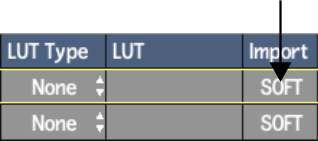
    The Import File options appear.

    Show small imageShow large image

  12. Set any options, as needed.
    WarningThese options are provided here in case you are having trouble relinking certain media files. If the files are already found, changing any of these options may prevent them from relinking.

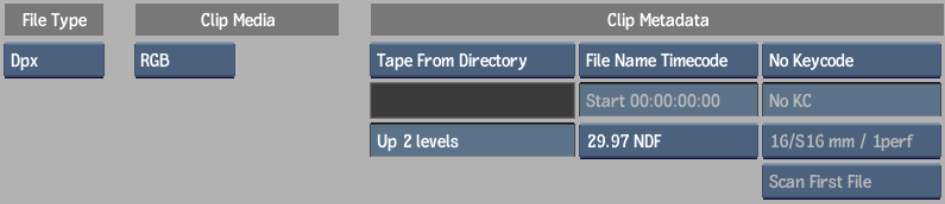
    See Clip Metadata Group.

  13. Optional: Change the name of the reel in the Library Reel Name field.
  14. Click Import All Files.

    All the files should now be imported or soft-imported.

    Show small imageShow large image

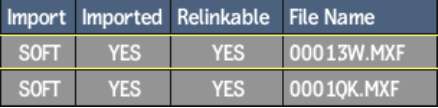
    The Imported column indicates whether a file was imported or not. The Relinkable column displays whether the file is relinkable. A file can be imported and non-relinkable if a discrepancy exists between the resolution of the AAF and the found media. Also, the media may have already been imported previously, in which case this column would already be checked accordingly.

  15. Click the Relink tab.

    The Timeline Reformat and Consolidate options appear.

    Show small imageShow large image

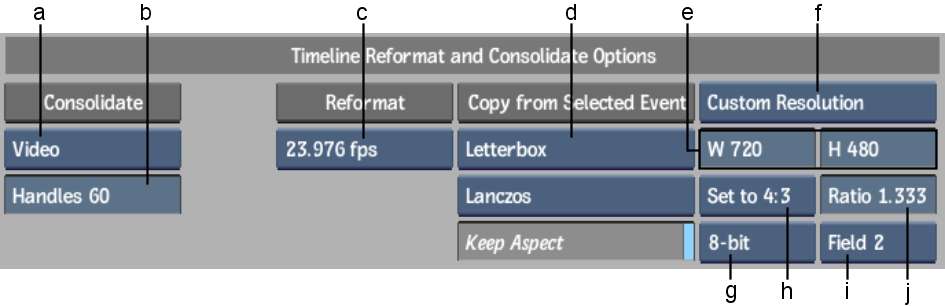
    (a) Consolidate option box  (b)  Handles field   (c) Frame Code Mode box  (d) Fit Method box  (e) Width and Height fields  (f) Resolution Presets box  (g) Bit Depth box  (h) Aspect Ratio Presets box  (i) Scan Mode box  (j) Aspect Ratio field  

    Show small imageShow large image

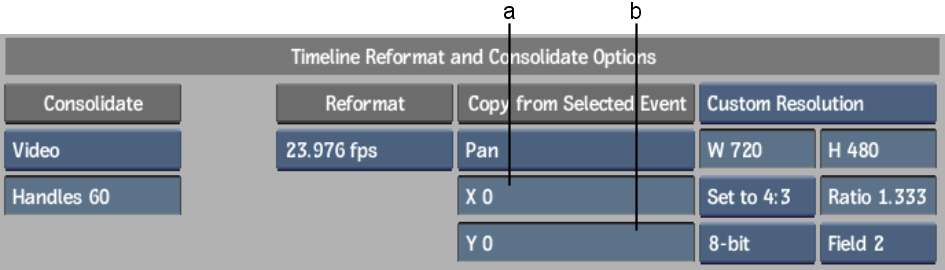
    (a) Pan Start X field  (b)  Pan Start Y field   

    See Processing Group.

  16. Optional: To reformat the timeline to match the resolution of a given clip, specify the destination resolution by doing one of the following:
    • Click the Copy from Selected Clip button to copy the formatting information of a selected clip into the Resolution parameters.
    • Select a preset from the Resolution Presets box.
    • Specify the dimensions using the Width and Height fields.
  17. From the Frame Code Mode box, set the frame rate and drop frame mode as needed.

    If you have a clip that contains some linked media and some unlinked metadata, when you change the frame code mode such that the duration of the clip is affected, the unlinked metadata and linked media are treated differently. The linked media is timewarped to accommodate the new duration. For unlinked metadata, if more material is needed to accommodate the change in duration, it is input when the clip is recaptured. Effects will look identical, although the timing of the clip will be adjusted.

  18. Optional: Set the aspect ratio, bit depth, and scan mode.
  19. Optional: If your clip contains video tracks or segments that still contain media (for example, module-processed shots), select a resize fit method from the Fit Method box.
  20. Click Reformat and confirm the action. If there are multiple clips to confirm, you can click Confirm All to confirm them all or click Confirm for each clip.

    The clip metadata for the timeline clips is updated to the specified values. Any existing media is also converted and resized using the specified fit method. You can now recapture the media associated with these clips in the appropriate format.

  21. If consolidation was not performed in your Avid application, do it now.
    1. From the Consolidate box, select Audio, Video, or All Tracks.

      This determines which tracks will be affected by the consolidate operation.

    2. In the Handles field, set the maximum number of head and tail frames that you want to retain after consolidating the clip.
    3. Click Consolidate and confirm the operation.
  22. Ensure that all media files are relinkable. Click the Relinkable header to sort the list and group any NOs at the top.

    Some files that are not relinkable may only need to be resized to be compatible. For example, the Soft Resize feature allows you to import Quicktime files, included with the AAF, at 720x480 instead of the usual NTSC 720x486.

  23. For files that are not relinkable, enable Soft Resize, and then click Import Selected Files.

    Show small imageShow large image

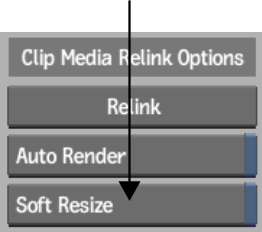
    Soft resize is applied to all clips that need it.

    If the files are still not relinkable then they cannot be soft-imported. Try to import the files normally, or check with your system administrator.

  24. Click Relink.

    A new reel with the AAF filename is created in the clip library for each imported AAF file. The assembled clip in the new reel has the same name as the original Avid sequence, and is placed in the same reel as the media.

  25. Click Exit Recapture to end the session.