Use the preferences when editing on the timeline.


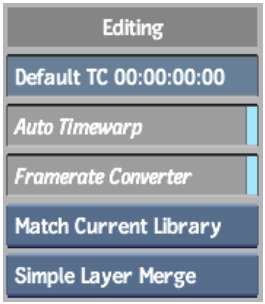
Default Timecode fieldYou can specify the default start timecode value for new items overwritten or inserted into the Record Area. By default, the start timecode is 00:00:00:00.
Auto TimewarpEnable when performing a four-point edit if you do not want to timewarp the frames from the source clip. Auto Timewarp is enabled by default. When Auto Timewarp is disabled, a four-point edit is treated as a three-point edit.
When you specify the number of frames in the record clip for the four-point edit, the same number of frames is used in the source clip. The source clip selection begins at the in point. If the source is shorter or longer than the number of frames specified in the record clip, a timewarp is applied to the source clip in order to match the duration of the record clip.
Framerate ConverterControls non-native framerates. When enabled (default), this tool formats the source clip to the correct destination framerate by applying a video timewarp or an audio timewarp to the source clip.
Match boxUse the Match options with the Match hotkey to match record clips with their source clips. See Matching Clips with Their Source Clip. Select from the following options.
| Select: | To: |
|---|---|
| Match Segment | Perform a copy of the selection with in and out points representing the edit. |
| Match Current Library | Match the selection to the original source clip (including all tracks of the source clip). For instance, if the element is video, the loaded source clip may contain sync audio as well. If the source clip is not located, a Match Segment is performed. |
| Match All Libraries | Match the selection to the original source clip. This option is the same as Match Current Library except that all project libraries are searched until the source clip is located. As a result, this match operation can take longer than the other two. If the clip is not found, a Match Segment is performed. |
Merge Layers Mode boxDefines how a timeline will be 'flattened' when using the Merge Layers command. This command is used to create a one-layer version of a multilayer video track. See About Managing Media on the Timeline.
| Select: | To merge layers by: |
|---|---|
| Simple Layer Merge | Hard committing all soft transitions. Cut points between elements are preserved; clip handles are not. |
| Complex Layer Merge | Hard committing soft transitions but creating separate elements with clip handles for each. |
| Committed Layer Merge | Preserving editable soft transitions and clip handles. |


