You
can log shots and batch digitize them. To do this, you shuttle through
the tape, mark in and out points that correspond to the sections
you want to digitize, and then add those sections to a list of shots
to digitize all at once.
NoteThis operation only
logs and captures video.
To batch digitize shots from a video
tape:
- Click Editing, and then click Capture.
The Capture menu appears.
- Select a raster for capture. See
Selecting a Raster for Capture.
- In the Video Capture Format list, select
the file format that you want to create during the capture operation.
- In the Naming group, enter values in
the Capture and Tape fields. See
Capture Menu Options.
WarningIt is important that
you enter a tape name to avoid overwriting previously captured files.
- Set the in and out points. See
Setting In and Out Points.
- In the EDL Log group, click Add to add
the selected material to the events list.
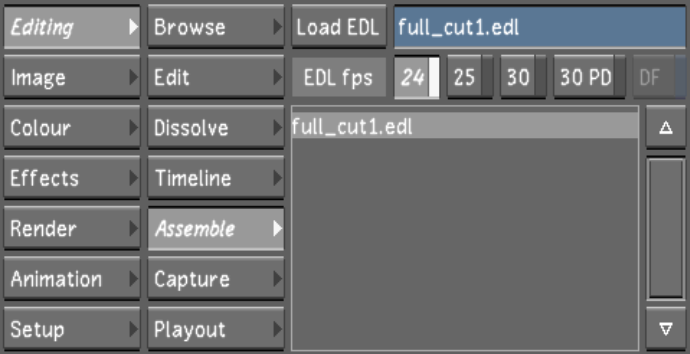
- To view the events list, click Editing,
and then Assemble.
You need to mark the
captures before returning to the Capture menu: click in the Event
column to select an entry, or click Select All, and then click Mark
for Capture.The entries marked for batch digitization appear in
the Assemble menu.
- Continue adding entries to the events
list as needed.
- (Optional) To delete an entry from the
events list, select it from the Assemble window and click Delete
Selected. Click it a second time to confirm the action. To clear
the list, click Delete All.
- When you are ready to digitize, return
to the Capture menu.
- In the Capture from group, click EDL
once and then confirm the action by clicking EDL a second time.