To create a Macro:
- Do one of the following:
- Middle-click your mouse or press the tilde key (~) to open the Gate UI. Swipe to the east to open the Tools tab. From the
Tools tab, select the Macro super tool or select a Macro super tool preset, if you have previously created one. Drag the Macro
super tool into the Schematic view.
- Or, from the Schematic view, select the nodes that you want to include in the Macro super tool, right-click and then select
Create Macro.
- Click the Macro super tool to display the Macro tab in the Tool UI.
- Make sure that the Customize UI button is disabled. The Customize UI button is enabled once you are in edit mode. Above the
Customize UI button, there are six more buttons for you to assign a tool, once you have added tools to the Macro super tool.
NoteWhen the Customize UI button is active, these six buttons are disabled.
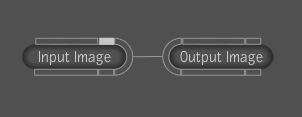
- Right-click the Macro node and select Edit to open the Macro view with an Input and Output Image node. (You can also double-click the Macro node to open the Macro view.)
Once inside the Macro super tool, what you see will depend on whether you connected the tool to a dependency graph or not.
If the Macro super tool is not connected to a dependency graph, you will see an input and an output image, which are simply
placeholders that represent the Macro's potential connections outside of edit mode. If the Macro super tool is connected to
a dependency graph, then the two nodes that it is connected to will be displayed instead of the input and output images.
- Next, choose the tools you want to add to the Macro super tool. Open the Gate UI and swipe to the east to open the Tools tab.
You can drag tools from the Tools tab directly into the Macro super tool.
- Once you have all the tools that you want to include with your macro in the macro view, click in an empty area of the Schematic
to deselect all nodes.
- Press and hold Ctrl. Click the first empty Macro button in the Macro tab.
- Still holding Ctrl, select the tool node you want to assign to the Macro button in the Schematic view and then click the
empty Macro button once more.
When you click on any of the tools you've added to the Macro super tool, the tab corresponding to the tool in the Tool UI
will specify that it is part of the Macro super tool.
See Customizing a Macro for information on how to modify an existing Macro's settings.
 Except where otherwise noted, this work is licensed under a Creative Commons Attribution-NonCommercial-ShareAlike 3.0 Unported License