One or more node-specific tabs appear when you select a node in a composition. For example, if you select the CC Histo tool,
you’ll see that it has a main tab, as well as a Ranges tab. You will typically select a node from the Schematic view, from
the Composition Browser or from the Layer Editor context menu.
Each composition node has a tab associated with it. In the case of imported media, the composition node for the composition
you currently have open has an Image Import tab that contains the same information as in the Import browser when you imported
the media to create the composition -- see Importing Media. The composition node for a linked composition has a Link Image tab that contains a list of the rendered output associated
with that composition -- see Linking Compositions.
A vertical bar in the tab indicates more options may exist underneath the area to the right of the bar. Drag right on the
bar to expose the options.
The contents of most tool node tabs are organized into left and right areas. The left hand area contains Player-related controls
and direct manipulation controls unrelated to the Player (for example, in the Diamond Keyer, the color prism), and fields
and widgets you can use to set or enter values. The area on the right is the Tool Options area; these options are common to
all tools.
The top row is used for selection history and navigation, and contains the following controls:
- Navigate nodes before current selection.
- Navigate to nodes selected after current selection.
- Navigate to node set as Home node.
- View entire node list and select a node.
- Set a home node from the history list. To set another node as a home node, select a node name and click .
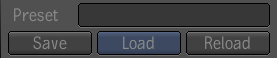
The next set of controls is for using Tool presets. See Tool Presets.
- Displays the name of the tool preset currently loaded in a selected tool node.
- After customizing a tool, you can save it as a tool preset.
- Displays a list of tool presets.
- Reloads the currently selected tool node with the same tool preset. This lets you revert back to the parameters contained
in the tool preset.
The lower portion of the Tool Options area contains the following controls:
- Move back one keyframe in the currently selected animation curve for this too node. For more information on setting the animation
keys, see Keyframing Workflow.
- Set Keyframe: set a keyframe in the animation editor for this tool node. For more information on setting the animation keys,
see Keyframing Workflow.
- Move froward one keyframe in the currently selected animation curve for this tool node. or more information on setting animation
keys, see Keyframing Workflow.
- Mute the currently selected tool node. This is a convenient way to toggle the effect of that node on or off. When you mute
a tool node, the node has no effect on the input it receives; it simply passes that input to the next tool node in the dependency
graph. If you mute a tool node that accepts multiple inputs, the node passes its primary input to the next too node.
Note Note that muting a tool node may not always be equivalent to removing it from the dependency graph. That is, if the input
and output formats of a tool node are different, removing the tool node may cause format conflicts in nodes further along
the dependency graph, but muting the tool would not cause format conflicts. For example, if the format of the output is different
from that of the primary input, the muted node adjusts the format, possibly in a tool specific way. For example, a muted Diamond
Keyer node outputs a solid white matte, a muted Noise node outputs a black image. You cannot mute a supertool.
- Resets all parameters of this tool node to their default values.
- Examine or edit the name of the currently selected tool node. To edit the name, click in the field, enter your edits, and
then press Enter.
- Displays the global and local time in a node affected by a Time Offset tool. Enables Global to display the global time in
the field to the right of the Global button. Disables Global to display the local time of the node in that field.
- Specifies the channels (RGB, RGBA, or A) the currently selected tool uses. The options available depend on the currently
selected tool. In some tools, this options may not be available.
- Allows the currently selected tool node to create an intermediate result whenever you play the composition. You can also
enable or disable intermediate results in the Schematic, by clicking the IR tab in the bottom-right corner of the node icon;
this tab is orange when you enable IR. See Creating Intermediate Results.
- Delete the currently selected tool node.
 Except where otherwise noted, this work is licensed under a Creative Commons Attribution-NonCommercial-ShareAlike 3.0 Unported License