The Blend Alpha tool is used to blend two mattes together under the optional control of a third matte. It has front, back, and matte inputs. It extracts a matte from the front image and composites it over the alpha channel of the back input using a choice of blend modes. The coverage of the front can be controlled by the matte input. The back is the primary input; the output inherits the format of the back input; this tool only affects alpha; if the back is an RGBA image, the color part is simply copied to the output.
The Blend Alpha tool has the following parameters:

Click the Blend button to view other available modes.
The following tables (grouped by type) list the available blend modes and describe the resulting blend effect.
| Mode | Blend Result |
|---|---|
| Normal | This is the default setting and displays the front input |
| Average | Adds the front and back, then divides by 2. |
| Add | Adds the front and back. |
| Subtract | Subtracts the front from the back. |
| Mode | Blend Result |
|---|---|
| Darken | Compares the pixels of the front and back inputs at a given location and selects the darker of the two. |
| Multiply | Multiplies the color values of the back input pixels and the front input pixels, producing a darker color. |
| Color Burn | Colorizes darker back input pixels with the front input color. |
| Linear Burn | Same as Color Burn but with less contrast. |
| Mode | Blend Result |
|---|---|
| Lighten | Compares the pixels of the front and back inputs at a given location and selects the lighter of the two. |
| Screen | Makes the light areas much lighter, darker areas somewhat lighter. |
| Color Dodge | Colorizes lighter pixels with the front input color. |
| Linear Dodge | Same as Color Dodge but with lower contrast. |
| Mode | Blend Result |
|---|---|
| Spotlight | Like Multiply but with 2 X the brightness. |
| Spotlight Blend | Same as Spotlight but also adds ambient illumination to the back input. |
| Overlay | Darkens or lightens the pixels depending on the back color. |
| Soft Light | If the front color is lighter than mid-gray, the image is lightened. If the front color is darker than mid-gray, the image is darkened. |
| Hardlight | If the front colors are lighter than mid-gray, screen mode is applied. If the front colors are darker than mid-gray, multiply mode is applied. |
| Pin Light | Replaces the back colors depending on the brightness of the front color. If the front color is lighter than mid-gray, back colors darker than the front color are replaced. And vice versa; if the front color is darker than mid-gray, back colors lighter than the front color are replaced. |
| Hard Mix | Produces either white or black depending on similarities between front and back. |
| Mode | Blend Result |
|---|---|
| Difference | Looks at the front and back inputs, and subtracts the less bright from the brighter one. |
| Exclusion | Similar to Difference but with less contrast. |
Blend curves are used to adjust the blend of the front and back elements by adjusting the amount of fractional opacity (pixel area) for the front, and one minus front. The latter gives more importance to the back. Blend curves is useful for controlling the blend along the edges of a matte by adjusting fractional values, not 0 and 1 values. Because mattes have fractional values along the edges, the blend curves affect the edge blending.
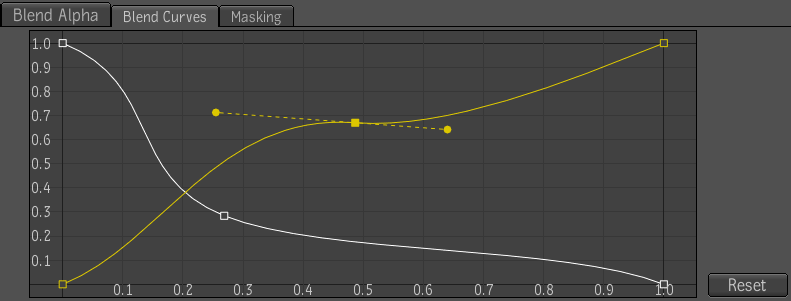
See Blending Curves with the Allpha Tool for more on blending curves.
 Except where otherwise noted, this work is licensed under a Creative Commons Attribution-NonCommercial-ShareAlike 3.0 Unported License


