


Learning Resources > Tutorials > Getting Started with Maya > File Referencing > Lesson 1: Using file references >
Creating a proxy for a
referenced asset
The zombies in your graveyard scene are even more complex than the willow tree. To further improve the performance, you can replace some of the zombies with proxies.
However, unlike the tree, the zombies in your scene are contained in assets. The procedure for creating proxy assets is slightly different from creating a proxy for other objects.
 .
.
A proxy file is created for the zombie. This file is the base for your proxy.
To create a proxy file for the zombie shuffle
The file contains a single locator node inside an asset named zombie_shuffle_AST. This locator represents the position of the zombie in the graveyard scene.

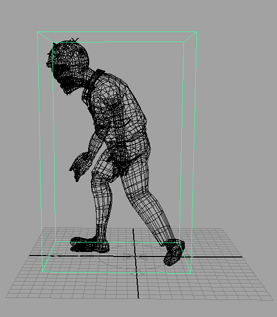
Since the zombie is far more complex than the tree as well as being animated, you will create a proxy from scratch, as opposed to using the original model as a starting point like the willow tree.
.
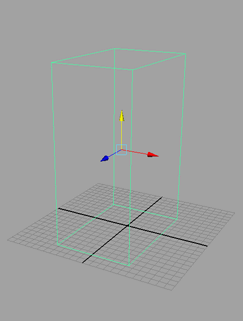
This cube will act as a stand-in for zombies in your graveyard scene. Because it is approximately the same size as your zombie, you can use it to accurately predict spacing in your scene.
If you want, you can make the proxy more elaborate by modeling it into a shape that is closer to the actual zombie.
Next you need to add animation that approximates the zombie’s shuffling animation.

 + select
zombie_proxy and then select
Edit > Transfer Attribute Values > .
+ select
zombie_proxy and then select
Edit > Transfer Attribute Values > .
The proxy object moves to the same location as the locator. This ensures it will be positioned correctly in the graveyard scene.
 -click
the Translate attribute and select Set Key.
-click
the Translate attribute and select Set Key.
Now if you play the scene, the cube moves approximately the same distance and speed as the zombie shuffle animation.

You can repeat these steps for each zombie you want to create a proxy for. Make sure you name the proxies appropriately so you know which zombies to apply them to since they are not interchangeable.