


Learning Resources > Tutorials > Getting Started with Maya > Scripting in Maya > Lesson 4: User interface
creation and procedures >
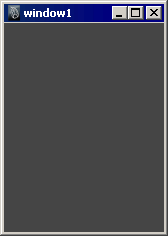
Creating a window
The first step in creating custom user interfaces is to create a window. This window contains the elements of the user interface such as text, buttons and other controls.
window -resizeToFitChildren 1; showWindow;
The -resizeToFitChildren flag on the window command specifies that the window automatically resizes to fit all of the elements within the window. This flag must have a value: a value of 1 turns on the flag, a value of 0 turns it off.
When you create a window, it is not visible until you use the showWindow command. The showWindow command without any arguments makes the last window created visible.
When creating windows with MEL scripting, you must ensure that every window and user interface control is given a unique name. If you do not explicitly give a window a name, it gets a default name. (In the previous procedure, the name of the window was window1, even though you didn’t use it.) You cannot reference or modify windows or controls that you don’t know the name of.
To refer to a user interface element by name
window -resizeToFitChildren 1 testwindow; columnLayout; text -label "This is a test window you can close by\ clicking the button below."; button -label "Close" -command "deleteUI testwindow"; showWindow;

Discussion: creating a simple window
In your window, you created elements for your user interface, called controls. All user interface controls must be created within a layout. Layouts instruct Maya how to arrange the user interface elements in the window.
There are many different types of layouts—for example, formLayout and rowLayout—but the simplest and easiest to use is the columnLayout. The columnLayout lays out your controls in a column, one underneath the other. For more information on layouts, see Layouts.
Within the layout you created a text control, with the text command. The label flag’s argument is the text displayed in the window.
The button is created by the button command. The argument of the command flag is a MEL command that is executed when the button is pressed. In this case, pressing the button executes the deleteUI command, which deletes the window you just created.
Scripts spanning multiple lines
In this script, individual commands span multiple lines. Commands can span multiple lines as long as the end line character is at the end of the command. One convention in MEL is to have the command keyword on one line, and pair the modifier flags and values on separate lines underneath the command, as in this example.
Strings can’t be split up over multiple lines without the use of a special character. To split a string over multiple lines, use the back slash (\) character. For example:
print "With the \\ character, you can \ split a string over \ multiple lines.";
To have a backslash appear in a string, you must use a double backslash. The backslash character is an escape character. Escape characters tell the script interpreter that the character that follows is literal. Certain special symbols can be created using the escape character in combination with other characters. For example, to display quotes within a string:
print "Jim said \"Hello!\" to the Maya user";