Learning Resources > Tutorials > Getting Started with Maya > NURBS Modeling > Lesson 1: Revolving a curve
to create a surface >
Editing a revolve surface
After you create a surface from a revolved curve, you can reshape the original creation curve to reshape the surface. This is possible because Maya’s Construction History feature was turned on before you did the revolve operation.
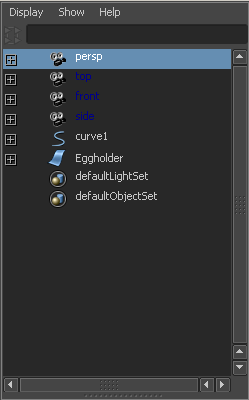
Selecting the original creation curve can be challenging when it is situated amongst other existing curves and surfaces. The Outliner is an editor that is useful for quickly examining the structure and components of a scene. The Outliner is also useful for selecting objects in situations like this.
To edit a surface with construction history
The Outliner appears and displays a list of the items in the scene.
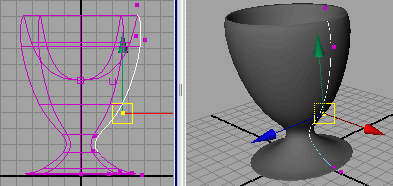
If you have trouble selecting one of the CVs in the front view, select it in the perspective view after dollying and tumbling the camera as necessary.
This modifies the shape of the egg holder because it is linked to the shape of the curve by its construction history.