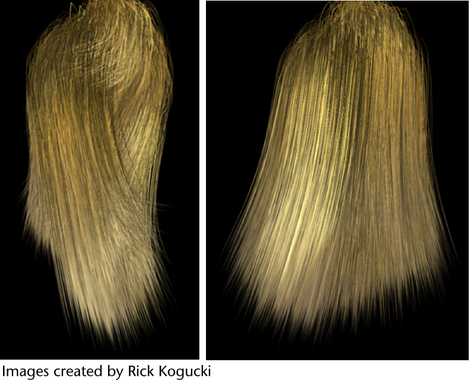
Hair
using Paint Effects can be rendered
directly using the Maya Software renderer. If
you convert the Paint Effects to polygons,
then you can render Hair in the mental ray and Maya
Hardware renderers. (See
Convert Paint Effects to polygons in
Paint Effects.) Alternatively you can output just curves to another
renderer, such as RenderMan.
TipYou can render more
hairs cheaply using Paint Effects Multi
Streaks. These attributes are in the Multi
Streaks section of the hairSystemShape.
You can render either
a single frame, or render an animation by performing a batch render.
For information, see the following:
To render a single frame with hair
- Before rendering be sure to display the
hair system’s Current Position (
Hair > Display > Current
Position) and go to the frame you want to render.
- Click the Render Settings
 button
in the Status Line and do the following:
button
in the Status Line and do the following:
- Select a renderer from the Render
Using drop-down list.
- If you’re rendering Paint
Effects using the Maya Software renderer,
then turn on the Oversample and Oversample
post filter options in the Paint Effects Rendering
Options section in the Maya Software tab.
This makes the hair even more realistic looking.
- If you’re rendering using mental
ray, see
Render Settings: mental ray tabs for
information about the options in the mental ray tab.
You can use the Production: Rapid Hair Quality
Preset when rendering hair in mental ray (Render
Settings window, Quality tab).
Alternatively, you can use the Production: Fine Trace Quality
Preset as a starting point if you want to trace fur or
hair in reflections.
- Click the Render
 button
in the Status Line. This renders the
current frame in the Render View window.
button
in the Status Line. This renders the
current frame in the Render View window.
To render an animation with hair
- Before rendering be sure to display the
hair system’s Current Position (
Hair > Display > Current
Position).
- Click the Render Settings button
in the Status Line. The Render
Settings window appears.
- Select a renderer from the Render
Using drop-down list.
- In the Common tab,
do the following:
- In the File Name Prefix field,
type the prefix you want to use for the rendered images.
- In the Frame/Animation Ext field,
select name.ext.#.
- In the Start Frame and End
Frame fields, type the first and last frames in the sequence
you want to render.
- Optionally, go to the renderer-specific tab and
turn on Motion Blur in the Motion
Blur section.
NoteThe animation will
take longer to render with
Motion Blur turned
on.
Motion blurred scenes
would benefit from scene caching to prevent simulation problems
during frame sampling. See
Use hair caches.
- If you’re rendering Paint
Effects using the Maya Software renderer,
then turn on the Oversample and Oversample
post filter options in the Paint Effects Rendering
Options section in the Maya Software tab.
This makes the hair even more realistic looking.
- If you’re rendering using mental
ray, see
Render Settings: mental ray tabs for
information about the options in the mental ray tab. You can use
the Production: Rapid Hair Quality
Preset when rendering hair in mental ray (Render
Settings window, Quality tab).
Alternatively, you can use the Production: Fine Trace Quality
Preset as a starting point if you want to trace fur or
hair in reflections.
- Do one of the following:
To view your rendered animation, launch Fcheck and
then open the rendered.iff file. For more information on viewing
the animation, see the Rendering guide.
Rendering using distributed
render
If you are performing
a distributed render, or if you are splitting up the render for
any reason, you should create a hair cache. Creating a hair cache
lets you do distributed rendering and have the simulation match
exactly.
For details, see
Use hair caches.
 . The Batch
Render Frame window appears. Change the options if desired
and click Batch Render.
. The Batch
Render Frame window appears. Change the options if desired
and click Batch Render.


