


Learning Resources > Tutorials > Getting Started with Maya > Dynamics > Lesson 1: Particles, emitters,
and fields >
Creating an emitter
Emitters create particles as an animation plays. The emitter controls the position, direction, quantity, and initial velocity of the emitted particles when they are born. After particles are born, the attributes of the particle object control their appearance.
You can make a standalone emitter, or you can make a surface, curve, and even another particle an emitter. You move an emitter the same way you move any geometry, such as setting keys or parenting it to a moving object.
In the next steps, you create a circle and emit particles from it.
 . In
the options window, set the following options and click Create:
. In
the options window, set the following options and click Create:
With Radius set to 4, the circle will be wide enough to see the particle emission clearly. With Number of Sections set to 25, the emission will be distributed evenly from points around the circle.
Note that the illustrations
in this chapter show the grid with a custom blue color and numbered
lines so that the shape and size of the objects you create are easier
to distinguish. (If you want to change the grid color in your scene,
select
Display > Grid > .)
By default, this creates an Omni emitter. If you dolly toward the center of the grid, you can see a tiny icon that represents the emitter. When you create an Omni emitter on a NURBS object, for instance, a circle, each control vertex (CV) of the object emits particles in all directions.
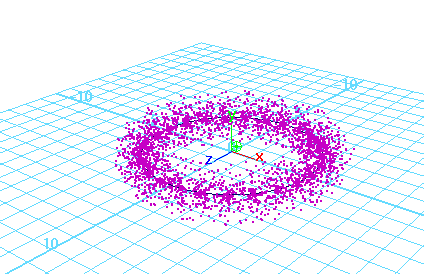
The particles begin to emit from the object. When you create any type of emitter, a particle object is automatically created and connected to it.
The connected particle object originally has no particles and is therefore invisible. As the animation plays and the emitter generates particles, the particle count of the connected particle object increases. When you go to the start of the animation, the particle count returns to 0.
Note that if you had created the circle with a smaller Number of Sections, there would be fewer CVs for the circle and therefore bigger gaps between the emission points on the circles.
This is the particle object. A particle object is a collection of particles that share the same attributes. You can create particle objects containing a single particle or millions of particles. Each particle in a scene belongs to some particle object.
The particle object’s attributes define the appearance and other characteristics of the emitted particles. The emitter’s attributes control the initial position, direction, quantity, and velocity of the emitted particles.
