


Learning Resources > Tutorials > Getting Started with Maya > Animation > Lesson 1: Keyframes and
the Graph Editor >
Fine tuning an animation
Now you can improvise adjustments to the animation on your own. For example, you might choose to speed the ball’s horizontal movement up to the first bounce but not thereafter. You might also decide to raise the peak height of the ball’s motion so that it doesn’t seem to hover over the fence unrealistically.
Whatever you choose to do, you’ll likely need to edit both the Translate X and Translate Y curves, not just one of them. Play the animation after each adjustment.
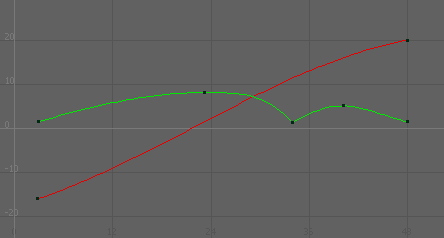
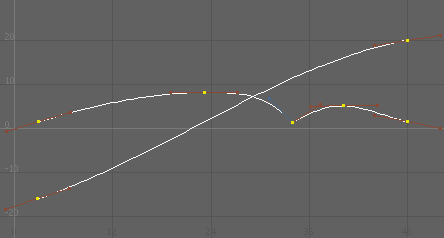
The following two figures show examples of curves after modification. The two graphs are identical, except the curve points are selected in the second figure. The second graph shows the position of the tangent handles.
If you want your curves to match the shape of the curves in the above figure, here’s what you would need to do:
To adjust the animation curves to match the above images
With fewer key points on the curve, it’s easier to maintain the curve’s smoothness for larger distances as you edit its shape. Small kinks in an animation curve can ruin an otherwise perfect animation, so it’s useful to remove key points that you aren’t using.
Notice that the slope of the Translate X curve increases slightly in the early part of the animation, then tapers off toward the end. This causes the ball to accelerate slightly at the beginning of the animation, then decelerate after its first bounce.
 , select
the curve, and middle-click the desired position on or off the curve.
, select
the curve, and middle-click the desired position on or off the curve.