Now
that the mechanical arm and cargo box are fully set up for animation it’s
a simple matter to pose the arm and set keyframes. Prior to setting
any keyframes you should take a few moments to plan the action for
the scene.
Planning the action usually
involves sketching a simple storyboard, and writing out a brief
timeline for the action for each component. In this lesson we’ve
provided a simple version for you. The basic premise for the action
is as follows:
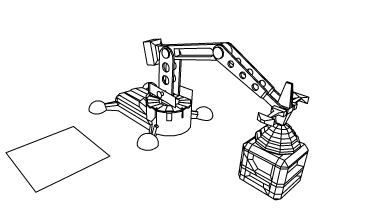
- The cargo box is positioned directly
in front of the mechanical arm.
- The mechanical arm extends, and positions
the cargo magnet to be directly touching the top of the cargo box.
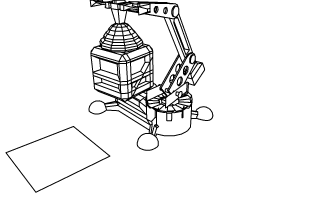
- The mechanical arm extends upwards, lifting
the cargo box, and rotates to the side.
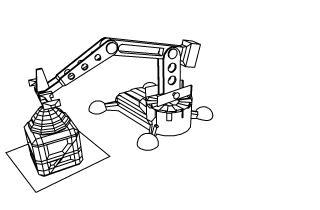
- The mechanical arm lowers the box, placing
it in a new position.
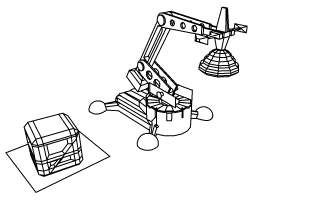
- The mechanical arm extends upwards, leaves
the cargo box in the new location, and rotates back to its original
position.
The table below breaks
down the action indicating what action occurs for each object at
the specified keyframes.
| Frame |
Mechanical Arm |
Cargo Box |
1
|
Collapsed position
|
Initial position
|
30
|
Vertically extended position
|
Initial position
|
60
|
Vertically lowered so
that cargo magnet is positioned on top of cargo box
|
Initial position
|
80
|
Vertically lifted to
extended position with cargo box
|
Cargo box lifted with mechanical
arm
|
100
|
SwivelBase rotated along with
arm to side
|
Cargo box repositioned along
with mechanical arm
|
120
|
Vertically lowered along with
cargo box to second position above surface
|
Cargo box is lowered
along with mechanical arm to second position
|
140
|
Vertically lifted to
extended position
|
Second position
|
160
|
SwivelBase rotated with
arm to original position
|
Second position
|
180
|
Collapsed position
|
Second position
|
To pose the mechanical
arm you select either the ArmControl or SwivelBase nodes and set
a keyframe depending on which component you want to pose:
- ArmControl controls the movement of the
mechanical arm.
- SwivelBase controls the rotation of the
arm.
- CargoBox’s position is based on the parent
constraint weights.