


Learning Resources > Tutorials > Getting Started with Maya > Animation > Lesson 5: Inverse
kinematics >
Applying parent constraints
on an IK system
To animate the cargo box so that it is picked up by the mechanical arm you need a method of constraining the cargo box to the mechanical arm so that it moves with the arm at specific times in the animation. This is accomplished using a parent constraint.
When a parent constraint is applied to an object, the constrained object behaves as if it were a child node of the constraining object.
An object can have multiple constraints applied to it. The influence each constraint has on the object can be changed by modifying the weight attribute for the parent constraint. The weight attribute is an animatable parameter and can be set to be on or off at specific frames.
In this lesson, the cargo box is constrained to both the ArmControl and the Platform on the floor. By animating the weight attributes for these two parent constraints, the cargo box will move from one location to another depending on which constraint is influencing it at specific times in the animation.
To set up the parent constraints you need to position the constrained object at the locations where the influence will begin or end, and then set the parent constraints.
To set parent constraints for the cargo box
The arm is repositioned so that the cargo magnet is directly above the cargo box as shown below. Track, tumble, or dolly the view if required so you can see the mechanical arm unobstructed.
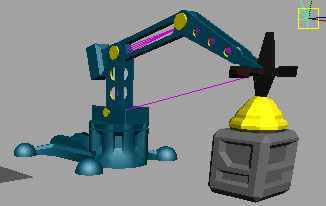
The order of selection is important when you apply constraints. You must select the constraining object first, and the item to be constrained second.
 .
.
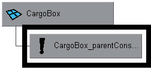
CargoBox is constrained to ControlArm. A new constraint node has been created below the CargoBox node in the Hypergraph. If you reposition the mechanical arm, CargoBox moves with it because of the constraint that is now applied.
The mechanical arm and the cargo box are positioned as shown below.
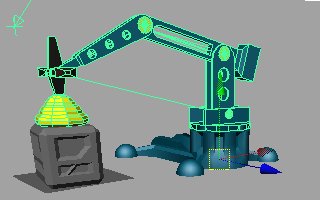
CargoBox is constrained to Platform. This is the second constraint for the CargoBox.
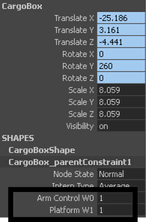
CargoBox has two parent constraints applied to it: Arm Control and Platform. In the Channel Box, the numerical settings beside ArmControl W0 and Platform W1 represent the influence weight each parent constraint has on CargoBox. At this point, each influence weight is set to a value of 1. If you move the mechanical arm, the cargo box will move somewhere between its first and second position. This occurs because each constraint has equal influence on the cargo box at this point.
Before you can animate the objects in the scene, you also need to reset the default weight values for each constraint, so that one parent constraint has full influence on CargoBox when the other does not.
To set the weighting for the parent constraints
Setting a rest position for CargoBox sets a position for the cargo box when no constraints are acting upon it. If the rest position is not set, CargoBox will be repositioned to the second constraint position.
At this point, both parent constraints are set to have no influence on the cargo box because their weight attributes are set to zero. When you animate the components in the scene, the weight attributes for the parent constraints will be set and keyframed depending on which constraining object (Arm or Platform) is required to have full influence.
In the next steps, you plan the action for animation of the IK system.