Normally, camera move
mode (  +
+  and also
  +
+  on the Mac) is calibrated
to best view objects at the origin (the center of world space, coordinate
0,0,0). This can become awkward when you want to move the camera
around objects away from the origin.
The point of interest manipulator lets you center the camera movements on a point on the model.
To use the point of interest manipulator
First, make sure the point of interest manipulator is turned on.
 ❒.
❒.
The General Preferences window appears.
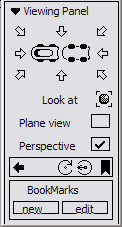
The ViewCube is the default view control, but we will use the Viewing Panel in these tutorials. The ViewCube and NavBar provide the same functionality as the Viewing Panel. For information, see Use the ViewCube tool and NavBar.
 and
and  keys (also
  and
and  on the Mac) to enter camera move
mode. Keep the keys held down for the rest of this procedure.
The Viewing Panel appears in the upper left corner of the Perspective window.
 .
.
The point of interest manipulator appears on the model where you clicked.
Drag with the  to tumble. The view tumbles
around the point of interest.
 instead, you can dolly on
the point of interest.
The point of interest manipulator jumps to the new point.
The manipulator moves across the surface of the object.
The arrow is light blue when it is pointing toward you and yellow when pointing away.
The view changes to look at the point down the normal.

These arrows represent the tangents along the U and V directions of the object.
The view changes to look down the tangent in the U direction.

Use the following overview illustration as a reminder of the different controls on the point of interest manipulator.
