After you have created objects, lights, and shaders, you can bring these elements together in the final rendering process. Alias offers industry standard sizes and types of rendering with adjustable quality levels. Generally, the better the rendering quality required, the longer the renderer takes.
The rendering process requires that you set up surfaces, cameras, lights, and any animation channels that may have been used in the scene. When a rendering is executed, all of the information about the scene is either streamed directly to the renderer for immediate rendering, or it is exported to a special file called the SDL file (Scene Description Language). This file can be saved and rendered later using a command line batch renderer. Users with programming experience can also edit the SDL file to change how it will render.
To decide which rendering type is required for your work, you must decide on the look you want.
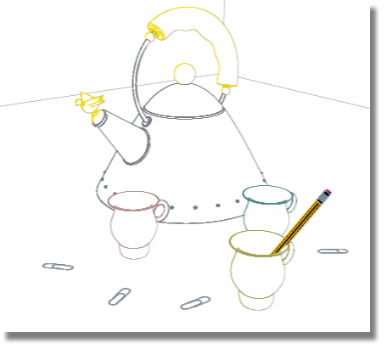
Hidden-line - This rendering type produces an outline rendering of the scene and renders objects using flat unshaded color.
Raycast - This rendering type produces a smooth shaded rendering of the scene that includes shadowing capabilities. Raycasting is faster than Raytracing, but lacks the extra realism added by true reflections and refractions. If necessary, reflections can be simulated in a Raycast rendering using environment maps and linear transparency. For long animations, Raycasting is often used to keep the rendering time for each frame short.

Raytrace - This rendering type gives a smooth shaded rendering of the scene that includes reflections, refractions, and shadows.

Before rendering, you must decide on both the size of the image and how detailed the image will be. The Render Globals window, under the Render menu, is used to set the size and resolution of the image, the quality of anti-aliasing, the raytrace rendering limits, and many other rendering parameters. Since many of the settings change the rendering time, you must balance the need for quality with that of size.
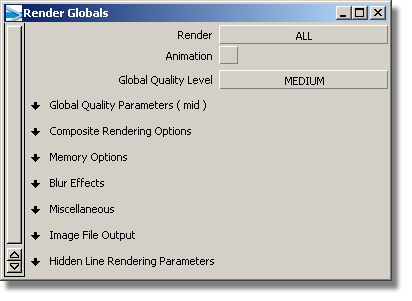
In the Image File Output section of the Render Globals window, you can set which cameras or orthographic views are rendered and the size of the rendered images.

Renderings are bitmap images that consist of a matrix of pixels, each holding a particular color. The size of the rendering is set in pixels, representing the number of colored squares along the X and Y axis of the rendering.
The Predefined Resolutions section of the Render Globals window contains a comprehensive list of image size standards you can choose from. As an example, North American image size for video is 645 x 486, which defines the NTSC standard.

If you want to render for print, you need to render at a pixel resolution that will give you enough pixels for the size of the printing job. Many print jobs use 300 pixels per inch (ppi) as a standard. To determine the final dimensions, you must multiply the resolution by the desired image size in inches. For instance, a 3" x 4" rendering would require a resolution of 900 (3 x 300) x 1200 (4 x 300) pixels. If you use the metric system, your standards may be a little different.
In order for a bitmap image to look good, the pixels must be as small as possible, so they are not easily perceived individually by the human eye. Every bitmap image has a resolution that determines how many pixels fill an inch, pica, or centimeter. A 10 ppi (pixels per inch) image displays 10 pixels in every linear inch of image. A 72-ppi image has 72 pixels per linear inch, and a 300-ppi image has 300 pixels per linear inch. As the image resolution gets higher, the image quality improves, to a certain extent.
If you are taking the image to press, check with your printer to find the number of lines per inch that are used — and double the number of lines to determine the maximum resolution you should be using. If you have a well anti-aliased picture, you can probably use a lower value (but always make it at least as high as the number of lines per inch).
For example, if your printer is using 85 lines per inch (say, for a newspaper), your image should be rendered at a maximum resolution of 85 x 2, or 170 pixels per inch. If your printer is using 150 lines per inch, your image should be rendered at a maximum resolution of 150 x 2, or 300 pixels per inch. Any resolution greater than twice the lines per inch will not likely improve the image — it will just take longer to render, and may cause some fine detail to drop out.
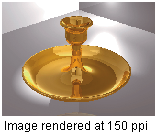
These next two images show the same file — but, at different resolutions. The first image is 40 ppi, and the second is 150 ppi.

Resolution is used to determine how big an image will display or print on an output device. Your monitor is an output device, as is your printer. Your monitor is typically capable of 95 dpi (dots per inch). Therefore, if you want to see a 4" x 5" image on your monitor, you need (95 dpi x 4") pixels and (95 dpi x 5") pixels, or 380 x 475 pixels. If you wanted to print the same image at the same size on a 300-dpi printer (which usually has 57 lines per inch), you would need (57 lpi x 2) x 4" pixels and (57 lpi x 2) x 5" pixels or 456 x 570 pixels. As you can see, the higher the image resolution, the more pixels you are going to need to see the same size of image.


