This lesson is a brief demo of how to use the Send To feature. The Send To feature allows you to share geometry between 3ds Max 2012 and other version 2012 products such as Autodesk Mudbox, Autodesk SoftImage, and Autodesk MotionBuilder.
If you don't have Autodesk Mudbox 2012 installed, you can skip this lesson.
Skill level: Beginner to Intermediate
Make sure both applications are using the same system unit:
 In 3ds Max, open the Customize menu and choose Units Setup.
 Start Autodesk Mudbox 2012.
 New Scene.

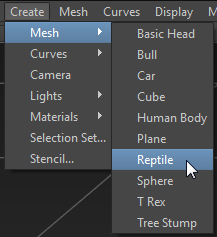
If you have turned off the Welcome dialog, it doesn't appear. In that case, choose Create Mesh Reptile.


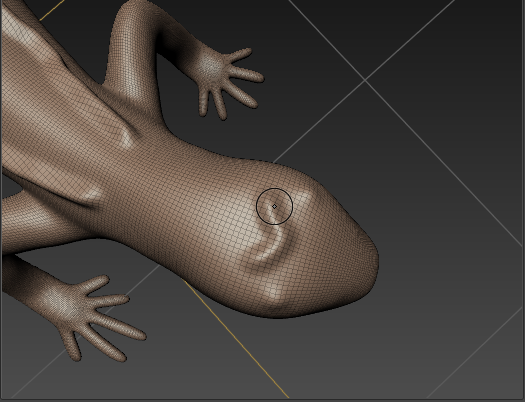
 Size field. Hold down B and drag to reduce the Size of the brush to somewhere between 4 and 5.


 Send To 3ds Max Send Selected As New Scene.
Mudbox displays a warning that you are sending the entire scene. Click OK.

Mudbox displays a message that you are sending meshes that are not at the base level. Click Send Meshes At Current Level.

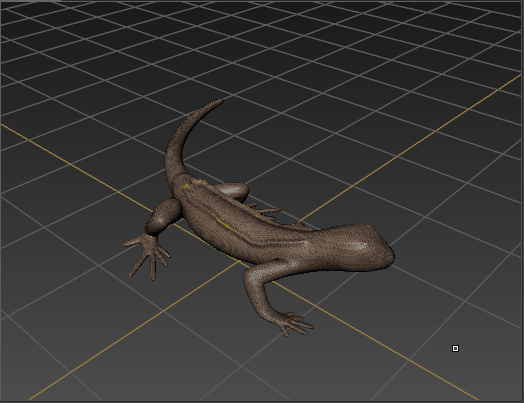
Mudbox launches 3ds Max. After a pause, the lizard model appears in viewports. It is already selected.
If 3ds Max displays the Welcome dialog, click Close to dismiss it.

 Modify panel, open the Modifier List and apply a Bend modifier to the model.

Send the model back to Mudbox:
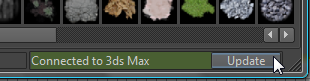
 (Update Current Scene to Mudbox).

After a pause, the Mudbox window opens and shows the changed geometry.
Send the model back to 3ds Max:
After a pause, the model appears in 3ds Max viewports with the change you made in Mudbox.

Assume that for now your modeling work is done.
 to close the Send To connection.
You can also close the connection by closing the scene in either application, or exiting either application.
In 3ds Max, reduce the face count and finish the model:
 select the reptile model and look at the modifier stack, you can see that importing from Mudbox again has added two modifiers to the stack:
an Edit Normals modifier and an Edit Poly modifier.
select the reptile model and look at the modifier stack, you can see that importing from Mudbox again has added two modifiers to the stack:
an Edit Normals modifier and an Edit Poly modifier. 
This is an unwieldy model to work with, with a very high face count. High face counts are typical of Mudbox models, but suppose that from now on you plan to edit the model in 3ds Max alone. The steps in this procedure show how to reduce polygon count.
3ds Max displays a warning about collapsing the stack. Click Yes.


The ProOptimizer modifier analyzes the model. When the calculation is done, the text box below the Calculate button shows the statistics of the model.

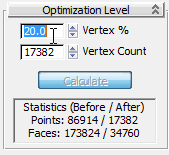
As the statistics show, the model is now considerably simpler while its appearance is much the same as before.
You can pass geometry back and forth between Autodesk 2012 applications that support the Send To feature. As long as both applications remain open, the link remains active unless you close it yourself.


 Mudbox Interoperability with the Send To Feature