By default, the sample object in a sample slot is a sphere. You can use the Sample Type flyout to change this to a cube or a cylinder. You can also create a custom sample object by creating a 3ds Max scene that shows the object.
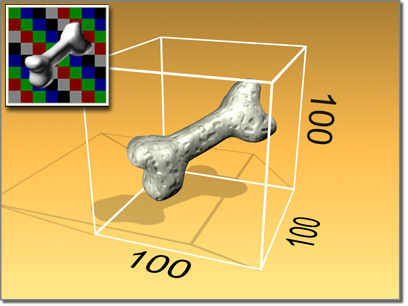
Custom sample object fits within a 100-unit cube
Overview of Using a Custom Sample Object
See Procedures for more details.
The scene you create should contain a single object that fits into an imaginary cube that is 100 units on each side. The object must be at the root level of the scene: it can't be linked to other objects. If more than one object is in the scene, only the first object listed in the Track View hierarchy is used as the sample object.
If the object is of a type that doesn't have a Generate Mapping Coords check box, apply a UVW Map modifier to it.
After you have saved the single-object scene as a MAX file, use the Custom Sample Object group in the Material Editor Options dialog to specify the file. When you specify the file, a new button is displayed at the right of the Sample Type flyout. This button, which shows an object with a question mark, displays the sample object file you chose.
If the sample object scene contains only the object, sample slots display it with default lighting. If the scene also contains a camera and lights, you can use the camera to specify the view, and the lights to light the object as you choose. Turn on Load Camera and/or Lights in the Custom Sample Object group.
To set up a custom sample object:
The object should fit into an imaginary cube that is 100 units on each side. Also, the object must be at the root level of the scene: it can't be linked to other objects.
If more than one object is in the scene, the Material Editor uses the first object listed in the Track View hierarchy.
If the object has a Generate Mapping Coords check box, it's on by default, and the Material Editor uses those coordinates. If you want to use coordinates other than those built into the object, assign a UVW Map modifier and set up your own coordinates.
Your custom object is displayed in the sample slot.
If the size of your object is not quite right for the sample slot, adjust its size and save the scene again. To update the sample slot so it uses the newly saved MAX file, open the Material Editor Options dialog, and then click OK.
To use a camera and lights with the custom sample object:
If more than one camera is in the scene, the Material Editor uses the first camera listed in the Track View hierarchy.
Sample Slots set to use the custom object now display the object as seen through the camera. If lights are in the scene, those lights are used in the sample slot instead of the default lights.


 (Material Editor): Compact
 (Material Editor Options)