The Compact Material Editor is a material editor interface that uses a smaller dialog than the Slate Material Editor.
In general, the Slate interface is more versatile when you are designing materials, while the Compact interface is more convenient when you just need to apply materials that have already been designed.
The Compact Material Editor has a couple of options that the Slate Material Editor does not; in particular:
To view the Compact Material Editor:
 (Material Editor) (the Compact version). If the Slate Material Editor button is visible, you need to open the flyout (click
and hold) to access the Compact Material Editor button. Or you can just open the Slate Material Editor and then choose Compact
Material Editor from the Modes menu.
(Material Editor) (the Compact version). If the Slate Material Editor button is visible, you need to open the flyout (click
and hold) to access the Compact Material Editor button. Or you can just open the Slate Material Editor and then choose Compact
Material Editor from the Modes menu.
The Compact Material Editor has sample slots for viewing previews of materials. When you first view the Material Editor, the material previews have a uniform default color.
To give a material a different name:
The name of the active material appears in the title bar of the Compact Material Editor dialog. The name of the material is not a file name: it can contain spaces, numbers, and special characters.
The name field displays only 16 characters, but a material name can be longer than that.
To make a copy of a preview material:
 (Make Material Copy ).
To get a material from a scene:
If a material that you want to change is present in the scene but not in the Compact Material Editor, you can load the material by getting it from the scene.
Be careful not to click the sample slot of a material you want to use later.
 Get Material .
A modeless Material/Map Browser opens.
If the scene contains many materials and the object is selected, you can quickly narrow the list down by right-clicking a blank section of the Scene Materials section, such as the left side of the list, and choosing Filter Selected Objects. The list then contains only materials applied to the current selection.
Or you can drag the material name to the sample slot.
The material you chose replaces the previous material in the active sample slot.
To apply a material to objects in a scene:
If the object isn't selected, or if it's the only object selected in the scene, the material is applied immediately. If the object is one of several selected objects in the scene, 3ds Max prompts you to choose whether to apply the material to the single object only or to the whole selection (the latter is the default choice).
You can also apply materials to a selection by clicking  (Assign Material To Selection) on the Compact Material Editor toolbar.
To remove a material from an object:
 Select the object.
To put a material back into a scene:
 (Put Material To Scene).
The material in the active sample slot is now a hot material.
The Put Material button is available only when (1) the material in the active sample slot has the same name as a material in a scene, and (2) the material in the active sample slot is not hot. In other words, this command is meant to fit into the following overall sequence of handling materials:
These steps are not as immediate as changing a material while it is hot, but they help you avoid changing the scene's materials unintentionally or in unexpected ways.
When a material in the Material Editor is applied to objects in the scene, you can select the objects from the Material Editor.
To select objects that have the same material applied:
When a material in the Material Editor is applied to objects in the scene, you can select the objects from the Material Editor.
White corner brackets indicate materials that are in the scene.
 (Select By Material ).
This button is unavailable unless the active sample slot contains a material in the scene.
The Select Objects dialog opens. The names of objects with the active material applied are highlighted when the dialog appears.
You can also change the selection by choosing other objects. If you change the selection, you can then apply the active material
to newly selected objects by clicking (Assign Material To Selection).
To get a material from a library:
(Get Material ).
3ds Max opens a modeless Material/Map Browser.
The material you chose replaces the previous material in the active sample slot.
To save a material in a library:
 (Put To Library.
The material is saved in the currently open library. If no library is open, a new library is created. You can save the new library as a file using the Material/Map Browser controls.
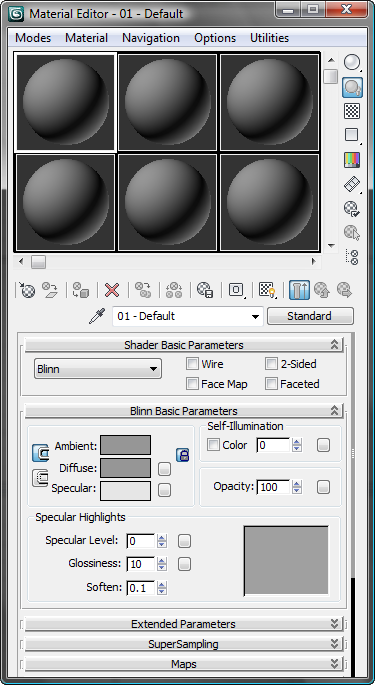
The Material Editor interface consists of a menu bar at the top, sample slots (the spheres) below the menu bar, and toolbars along the bottom and side of the sample slots. For links to topics describing these interface elements as well as overviews of materials and maps, see the end of this section.
The Material Editor interface also includes a number of rollouts whose contents depend on the active material (click a material's sample slot to make it active). Each rollout contains standard controls such as drop-down lists, check boxes, numeric fields with spinners, and color swatches.
In many cases, associated with a control (typically to its right) is a map shortcut button: a small, square, blank button, which you can click to apply a map to the control. If you have assigned a map to a control, the button displays the letter M. An uppercase M means that the corresponding map is assigned and active. A lowercase m means that the map is assigned but inactive (turned off). You turn maps on and off with the check boxes on the Maps rollout (see this procedure and the one following it). You can also right-click the map shortcut button to access functions such as copy and paste (see Copying and Pasting Materials, Maps, Bitmaps, and Colors).
For choosing materials, see Material/Map Browser. For applying materials using drag and drop techniques, see Dragging and Dropping Maps and Materials.
For an overview of how to use the Material Editor, see Designing Materials.
The sample slots let you maintain and preview materials and maps. Each slot previews a single. You can change the material by using the Compact Material Editor controls, and you can apply the material to objects in the scene. The easiest way to do this is to drag the material from the sample slot to objects in viewports. See Dragging and Dropping Maps and Materials.
Above the Material Editor sample slots is the menu bar. Below and to the right of the sample slots are buttons and other controls that you use to manage and change maps and materials.


