The Particle Paint helper enables you to apply particle seeds with a specific pattern and timing onto the surface of one or more objects.
Particle seeds painted with the Particle Paint helper are not particles, but are seeds that can be turned into particles with the Birth Paint or Placement Paint operators in Particle Flow.
You can spray particle seeds with a freehand painting tool, or by using 3ds Max splines to define the pattern. Particle Paint works in any orthographic viewport such as a Front or Top view. It sprays directly into the viewport (that is, perpendicular to the plane of view), and plants particle seeds on the surface of first object that it hits.
To create the Particle Paint icon, click Create panel  Helpers Particle Flow Particle Paint, and then drag in a viewport.
The Particle Paint icon is composed of two parts: a circle and a spray can icon.
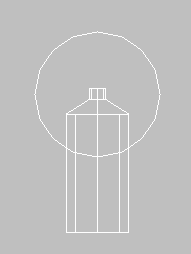
Particle Paint helper icon
The Particle Paint helper uses the metaphor of a real-world airbrush to spray-paint particle seeds onto a surface. When you use the Freehand paint tool, particle seeds are sprayed through a virtual nozzle, as with an airbrush. The circle in the Particle Paint icon represents the size of the nozzle. If, on the other hand, you use stroke splines, the particle seeds are sprayed along the spline.
The Particle Paint icon does not have to sit in front of or on the objects on which you plan to paint particle seeds, nor does it have to be created in the viewport in which you plan to paint.
Deleting the Particle Paint icon deletes all particle seeds and strokes associated with it.
The Particle Paint helper works with particle groupings called strokes. With a real-world airbrush, each time you depress the nozzle, spray, then release the nozzle, you create a stroke. With the freehand tool, you can drag across objects several times to create strokes. With the spline method, you can pick several splines to create different strokes.
Each set of strokes stored with the Particle Paint helper can be used as a series of birth instructions with the Birth Paint and Placement Paint operators in Particle Flow. You can work with each stroke separately to adjust its timing, delete some of its particles, and perform other operations. To edit particle seeds and strokes after creating them, select the Particle Paint helper and then access the Editing rollout on the Modify panel.
You can undo the creation of strokes, and you can also delete particle seeds or change particle seed timing with the options on the Editing rollout. You can also restart by deleting the Particle Paint helper and creating a new one.
Example: To create strokes with freehand painting:
 Create panel
  (Helpers). Choose Particle Flow, then on the Object Type rollout, click Particle Paint. Drag in any viewport to create the
Particle Paint helper.
(Helpers). Choose Particle Flow, then on the Object Type rollout, click Particle Paint. Drag in any viewport to create the
Particle Paint helper.
 Modify panel.
After you release, the particle seeds appear as +-shaped tick marks on the object surface.
As you drag the time slider, the particle seeds change color as they become eligible for birth. You will see the second stroke begin at the frame to which you moved the time slider before making the stroke.
To create strokes with splines:
The splines don't have to actually be in front of the 3D object in 3D space. But because Particle Paint will project the splines onto the object to create particle seeds, the splines must overlap the 3D object when viewed in the viewport.
Create panel Helpers . Choose Particle Flow, then on the Object Type rollout, click Particle Paint. Create the Particle Paint helper in any viewport.
Modify panel.
This creates a second stroke, starting at the current frame.
As you drag the time slider, the particle seeds change color as they become eligible for birth. You will see the second stroke begin at the frame to which you moved the time slider before picking the second spline.
The controls on the Setup, Orientation, and Mapping rollouts set parameters for particle seeds upon creation. These settings go into effect when you create the particle seeds with the freehand or spline tool. Changing the parameter values after you create particle seeds has no effect on the seeds. After particle seed creation, you can change some aspects of seeds and strokes with the Editing rollout settings.
The Particle Paint rollouts are as follows:
Setup Rollout (Particle Paint)
Layout Rollout (Particle Paint)
Orientation Rollout (Particle Paint)


