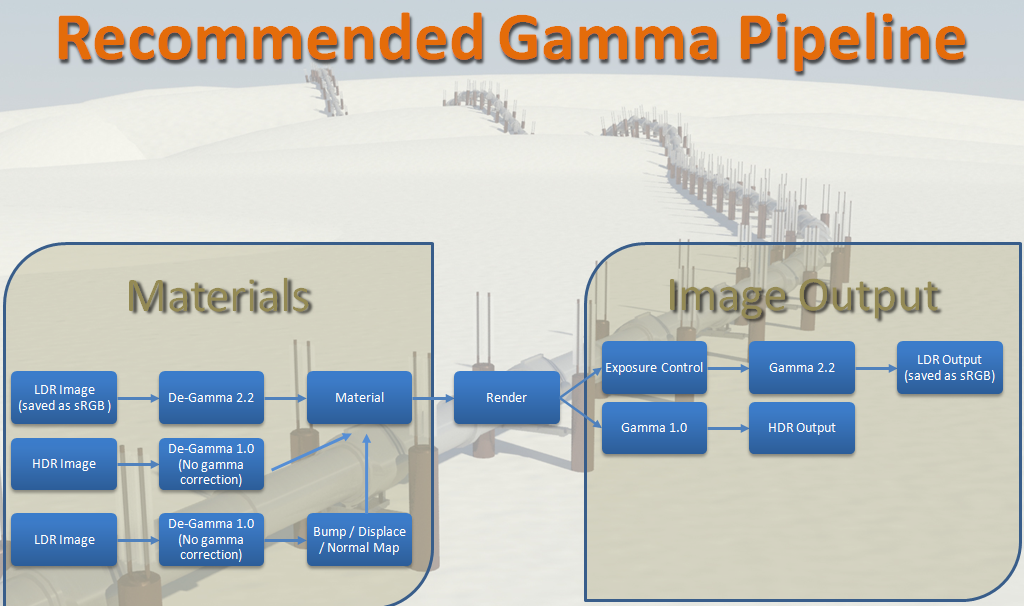
To maintain consistent gamma handling when rendering scenes that contain a combination of low-dynamic-range and high-dynamic-range
images, follow this procedure, as outlined in the following diagram:
Procedure
To handle gamma with input and output of images containing different dynamic ranges, when rendering with mental ray:
- Consider each source image (used in a material, as a background, reflection map, and so on):
- If using a low-dynamic-range image as anything other than a bump, displacement, or normal map, save it from Adobe Photoshop
or a similar program using the sRGB working space (see this procedure), use it as an input shader within the Utility Gamma & Gain (mi) shader, and make sure Gamma is set to 2.2 and the Reverse Gamma Correction (De-Gamma) switch is on. (These are the default settings.)
NoteAs an alternative to using the Utility Gamma & Gain shader, turn on
Enable Gamma/LUT Correction and then, each time you load an image, set Select Bitmap Image File Dialog
 Gamma Group
 Override to 2.2. This method has the added benefit of showing the gamma correction in the viewports, and is supported by
the default scanline renderer as well as mental ray (the shader works with mental ray only).
- If the image contains a high dynamic range, no gamma correction is necessary.
- If using a low-dynamic-range image as a bump, displacement, or normal map, no gamma correction is necessary.
- Consider the output:
- If you want the output image to contain a low dynamic range (for example, JPEG, BMP, or PNG), use an exposure control (preferably
the mr Photographic exposure control) and set Output Gamma to 2.2.
- To output a high-dynamic-range image (such as OpenEXR), don’t use gamma correction or an exposure control.
- Render the scene.