The Radial Density dialog allows you to add weight to any additional effect applied to the Lens Effect. By weighting the density of the additional effect that you apply you can choose particular areas in the effect to display more of the additional effect or to eliminate it altogether. You can also use Radial Density to gradually fade the additional effect from maximum density down to zero or you can create a sharp edge to the transition.
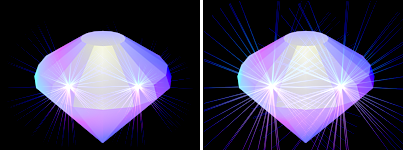
Object with different Ray effects due to different Radial Density settings
The Radial Density dialog has controls at the top for creating and moving Points on a curve on the graph below. The curve represents the density of the additional effect being applied to the Lens Effect. When you open the dialog you will notice that there is already a line with a Point on each end which represents the density of the effect. The default falloff is a fade from a density value of 1 starting from the center of the effect toward the outer edges which has a value of 0. This produces an effect with more density being rendered at the center of the effect and a gradual fading out to no density at the edges. By placing Points along the curve, you can drag these points to increase or decrease the density of an additional effect or eliminate it in some areas altogether.
Buttons are available at the bottom of the dialog that allow you to change the display of the dialog. You can also manually enter a horizontal or vertical position by entering a value into the two entry boxes.


 Move
MoveMoves selected points in any direction. Click and hold the Move button to display the flyout where you can select a button to move in any direction, move only in the horizontal direction, or move only in the vertical direction. The Move function remains active until you click another button. The button is yellow while it is active.
 Scale Point
 Add Point
Allows you to add points anywhere along the Radial Density curve. Click and hold the Add Point button to display the flyout where you can select a button to add either a Corner Point or a Bezier Point. Click once to enable Add Point. The Add Point function remains active until you click another button. The button is yellow while it is active.
 Delete Point


 Pan
Pan Zoom Extents
 Zoom Horizontal Extents
 Zoom Vertical Extents
 Zoom Horizontally
 Zoom
Zoom Zoom Region