An Orientation constraint causes an object’s orientation to follow the orientation of an object or averaged orientation of several objects.
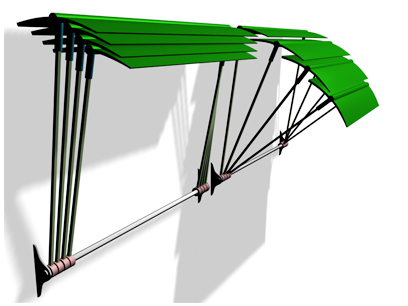
Orientation constraints align the awning vanes to the supporting rod.
An Orientation Constrained object can be any rotatable object. When constrained it will inherit its rotation from a target object. Once constrained you can not rotate the object manually. You may move or scale the object as long as its not constrained in a manner that effects the object’s position or scale controller.
The target object can be any type of object. The rotation of a target object drives the constrained object. Targets can be animated using any of the standard translation, rotation, and scale tools.
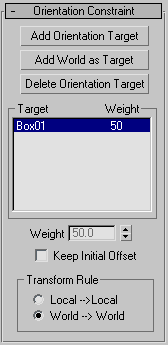
Multiple Targets and Weighting
A constrained object can be influenced by several target objects. When using multiple targets, each target has a weight value that defines the degree by which it influences the constrained object, relative to other targets.
Using Weight is meaningful (and available) only with multiple targets. A value of 0 means the target has no influence. Any value greater than 0 causes the target to influence the constrained object relative to other targets' Weight settings. For example, a target with a Weight value of 80 will have twice the influence of a target with a Weight value of 40.
To assign an Orientation constraint:
 Select the object you want to constrain.
 Constraints Orientation Constraint.
To access the Orientation constraint’s parameters through the Motion panel:
Select the Orientation-constrained object.
 Motion panel Rotation list, double-click Orientation Controller.
The Orientation constraint parameters are located on the Orientation Constraint rollout.
Select the constrained object.
Motion panel Orientation Constraint rollout.
Select the constrained object.
the Motion panel Orientation Constraint rollout, and choose a target from the list.
 (Auto Key).
Once you assign an Orientation constraint, you can access its properties on the Position Constraint rollout in the Motion panel. In this rollout you can add or delete targets, assign weighting, assign and animate target weight values, and adjust other, related parameters.