The items in the Array Dimensions group let you create one-, two-, and three-dimensional arrays. For example, a row of five
objects is a single-dimension array, even though it takes up three-dimensional space in the scene. An array of objects that's
five rows by three columns is a two-dimensional array, and an array of objects that's five rows by three columns by two levels
is a three-dimensional array.
TipYou can preview the array by turning on the Preview button. With Preview on, changing the array settings updates the viewports
in real time.
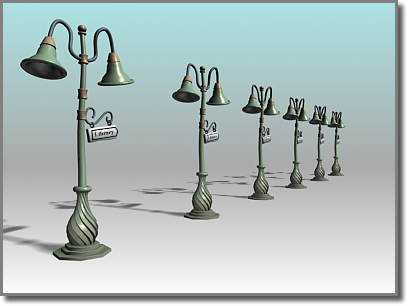
Play this to see an example of creating a 2D array:
Procedures
To create an array:
Select the objects to array.
Do one of the following:
On the Extras toolbar, click (Array).
On the Tools menu, choose Array.
3ds Max opens the Array dialog.
On the Array dialog, select the type of object to output: Copy, Instance, or Reference).
In the Preview group, click the Preview button to turn it on.
This lets you see the results of the array operation in the viewports, with changes appearing in real time.
In the Array Transformation group, click the arrows to set Incremental or Totals array parameters for Move, Rotate, and Scale.
Enter coordinates for the Array Transformation parameters.
Indicate whether you want a 1D, 2D, or 3D array.
Set Count to the number of copies on each axis.
Enter the appropriate values in the numeric fields for Incremental Row Offsets.
Click OK.
The current selection is duplicated the specified number of times, with each object transformed as indicated.
To replace an array:
Undo the array to replace, using Edit Undo Create Array, or press Ctrl+Z.
Change the coordinate system and transform center, if needed.
Do one of the following:
On the Extras toolbar, click (Array).
On the Tools menu, choose Array.
3ds Max opens the Array dialog.
Adjust any parameters on the Array dialog that is displayed.
Click OK to create a new array, which replaces the previous version. Repeat these steps to fine-tune the array.
Example: To create an array of objects that numbers 5 x 4 x 3:
Create a teapot with a radius of 10 units.
Choose Tools Array to display the Array dialog.
In the Incremental set of parameters, set Move X (the upper-left field) to 50. This causes each object in the array to be positioned 50 units apart on the X axis.
In the Array Dimensions group, choose the 3D button to enable all the spinners in that group.
Set the 1D Count spinner to 5, the 2D Count spinner to 4, and the 3D Count spinner to 3.
This creates a row of 5 objects that are 50 units apart, and then 4 rows of those five objects, and then 3 rows of the 5 x
4 matrix of objects, resulting in a box array.
In the 2D row, set the Y spinner to 80.
In the 3D row, set the Z spinner to 100.
Click OK.
A box array of teapots appears. The first dimensional array is five teapots created along the X world axis, 50 units apart
(as specified in the Array Transform group). The second dimensional array is four layers created along the Y world axis, 80
units apart (as specified in the Array Dimensions group). The third dimensional array is three layers created along the Z
world axis, 100 units apart. The total number of objects in the array is 60.
Example: To create a 360-degree array:
Reset 3ds Max.
Near the top of the Front viewport (away from its center), create a long, thin box at the twelve-o'clock position (as if the
viewport were a clock face).
From the User Center flyout on the main toolbar, choose (Use Transform Coordinate Center).
Choose Tools Array.
Click the arrow button to the right of the Rotate label to enable the three Rotate fields in the Totals section.
Set the Z parameter to 360.0.
In the Array Dimensions group, choose 1D and set Count to 12.
Click OK.
3ds Max creates an array of 12 boxes in a full circle.
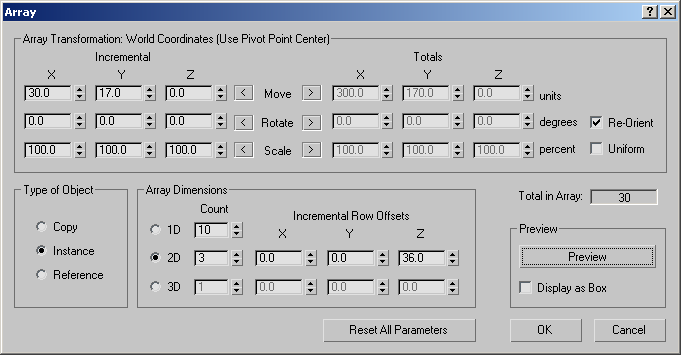
Interface
Array Transformation group
Specifies which combination of the three transforms to use to create the array. You also specify the extent, along the three
axes, for each transform. You can specify the extent of the transform in increments between each object, or in totals for
all objects. In either case, the distances are measured between the pivot points of the objects. The arrays occur using the
current transform settings, so the group title changes depending on the transform settings.
Click the left or right arrow button for Move, Rotate, or Scale to indicate whether you want to set Incremental or Total array
parameters.
Incremental
Move
Specifies the distance between each arrayed object along the X, Y, and Z axes, in units.
Rotate
Specifies the degree of rotation about any of the three axes for each object in the array, in degrees.
Scale
Specifies the percentage of scale along any of the three axes for each object in the array, in percentages.
Totals
Move
Specifies the overall distance, along each of the three axes, between the pivot points of the two outer objects in the resulting
array. For example, if you're arraying 6 objects and set Move X total to 100, the six objects will be arrayed in a row that's
100 units between the pivot points of the two outer objects in the row.
Rotate
Specifies the total degrees of rotation applied to the objects along each of the three axes. You can use this, for example,
to create an array that totals 360 degrees.
Re-Orient
Rotates the generated objects about their local axes while rotating them about the world coordinates. When clear, the objects
maintain their original orientation.
Scale
Specifies the total scale of the objects along each of the three axes.
Uniform
Disables the Y and Z spinners and applies the X value to all axes, resulting in a uniform scale.
Type of Object group
Determine the type of copies made by the Array function. The default is Copy.
Copy
Arrays copies of the selected object to the specified position.
Instance
Arrays instances of the selected object to the specified position.
Reference
Arrays references of the selected object to the specified position.
Array Dimensions group
Lets you add to the Array Transformation dimension. The additional dimensions are positional only. Rotation and scale are
not used.
1D
Creates a one-dimensional array, based on the settings in the Array Transformation group.
Count
Specifies the total number of objects along this dimension of the array. For 1D arrays, this is the total number of objects
in the array.
2D
Creates a two-dimensional array.
Count
Specifies the total number of objects along this second dimension of the array.
X/Y/Z
Specifies the incremental offset distance along each axis of the second dimension of the array.
3D
Creates a three-dimensional array.
Count
Specifies the total number of objects along this third dimension of the array.
X/Y/Z
Specifies the incremental offset distance along each axis of the third dimension of the array.
_____
Total in Array
Displays the total number of entities that the array operation will create, including the current selection. If you're arraying
a selection set, the total number of objects will be the result of multiplying this value times the number of objects in the
selection set.
Preview
Toggles a viewport preview of the current array settings. Changing a setting updates the viewports immediately. If the update
slows down feedback with large arrays of complex objects, turn on Display As Box.
Display as Box
Displays the array-preview objects as bounding boxes instead of geometry.
Reset All Parameters
Resets all the parameters to their default settings.
 Select the objects to array.
 (Array).
 Undo Create Array, or press Ctrl+Z.
 (Use Transform Coordinate Center).