Command entry:
 Application Menu
References
File Link Manager
File Link Manager dialog
Files panel
Reload a linked DWG/DXF file with Show Reload turned on.
File Link Settings: DWG Files dialog
Spline Rendering panel
Command entry: Application Menu References
File Link Manager
File Link Manager dialog
Presets panel
Select an existing DWG/DXF preset and click Modify.
File Link Settings: DWG Files dialog
Spline Rendering panel
Command entry: Application Menu References
File Link Manager
File Link Manager dialog
Presets panel
Create a new DWG/DXF preset.
Select the newly created preset and click Modify
File Link Settings: DWG Files dialog
Spline Rendering panel
Command entry: 
Utilities panel
Utilities rollout
More button
File Link Manager
File Link Manager dialog
Files panel
Reload a linked DWG/DXF file with Show Reload turned on.
File Link Settings: DWG Files dialog
Spline Rendering panel
Command entry: Utilities panel
Utilities rollout
More button
File Link Manager
File Link Manager dialog
Presets panel
Highlight an existing DWG/DXF preset and click Modify.
File Link Settings: DWG Files dialog
Spline Rendering panel
Command entry: Utilities panel
Utilities rollout
More button
File Link Manager
File Link Manager dialog
Presets panel
Create a new DWG/DXF preset.
Highlight the newly created preset and click Modify
File Link Settings: DWG Files dialog
Spline Rendering panel
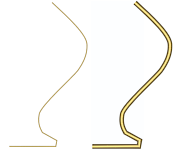
The Spline Rendering panel of the File Link Settings: DWG Files dialog controls how shapes will appear in the scene once the DWG or DXF file is linked. You can control the appearance of the shape,
its smoothing, mapping coordinates and if they can be rendered.
Interface
The controls on this panel are identical in name and operation to those found on the Rendering rollout for splines. The values of these settings are set for all imported shapes. Once the import is complete, you can change the
settings as necessary for each object.
- Enable in Renderer
-
When on, the shape is rendered as a 3D mesh using the Radial or Rectangular parameters set for Renderer.
- Enable in Viewport
-
When on, the shape is displayed in the viewport as a 3D mesh using the Radial or Rectangular parameters set for Renderer.
- Use Viewport settings
-
Lets you set different rendering parameters, and displays the mesh generated by the Viewport settings. Available only when
Enable In Viewport is on.
- Generate Mapping Coords
-
Turn this on to apply mapping coordinates. Default=off.
3ds Max generates the mapping coordinates in the U and V dimensions. The U coordinate wraps once around the spline; the V coordinate
is mapped once along its length. Tiling is achieved using the Tiling parameters in the applied material. For more information,
see Mapping Coordinates.
- Real-World Map Size
-
Controls the scaling method used for texture mapped materials that are applied to the object. The scaling values are controlled
by the Use Real-World Scale settings found in the applied material's Coordinates rollout. Default=on.
- Auto Smooth
-
If Auto Smooth is turned on, the spline is auto-smoothed using the threshold specified by the Threshold setting below it.
Auto Smooth sets the smoothing based on the angle between spline segments. Any two adjacent segments are put in the same smoothing
group if the angle between them is less than the threshold angle.
- Threshold
-
Specifies the threshold angle in degrees. Any two adjacent spline segments are put in the same smoothing group if the angle
between them is less than the threshold angle.
- Viewport
-
Turn this on to specify Radial or Rectangular parameters for the shape as it will display in the viewport when Enable in Viewport
is turned on.
- Renderer
-
Turn this on to specify Radial or Rectangular parameters for the shape as it will display when rendered or viewed in the viewport
when Enable in Viewport is turned on.
- Radial
-
Displays the 3D mesh as a cylindrical object.
- Thickness
-
Specifies the diameter of the viewport or rendered spline mesh. Default=1.0. Range=0.0 to 9999.0.
- Sides
-
Sets the number of sides (or facets) for the spline mesh n the viewport or renderer. For example, a value of 4 results in
a square cross-section.
- Angle
-
Adjusts the rotational position of the cross-section in the viewport or renderer. For example, if the spline mesh has a square
cross section you can use Angle to position a "flat" side down.
- Rectangular
-
Displays the spline's mesh shape as a rectangle.
- Length
-
Specifies the size of the cross–section along the local Y axis.
- Width
-
Specifies the size of the cross–section along the local X axis.
- Angle
-
Adjusts the rotational position of the cross-section in the viewport or renderer. For example, if you have a square cross-section
you can use Angle to position a "flat" side down.
- Aspect
-
Sets the aspect ratio for rectangular cross-sections. The Lock check box lets you lock the aspect ratio. When Lock is turned
on, Width is locked to Length that results in a constant ratio of Width to Length.