You can use Physique for facial animation, as an alternative to morphing. To do so, you must set up the face of a character with extra links. By setting up 3ds Max bones or other objects at appropriate locations on the mesh head, you can define a skeletal structure for moving the facial features.
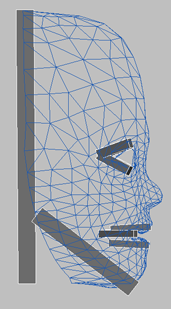
Boxes form the facial skeletal structure.
You can also use splines linked to the biped head to deform the mesh. You can add a spline to a character that already has Physique applied by using Add in the Physique Bones rollout and clicking the spline in a viewport.
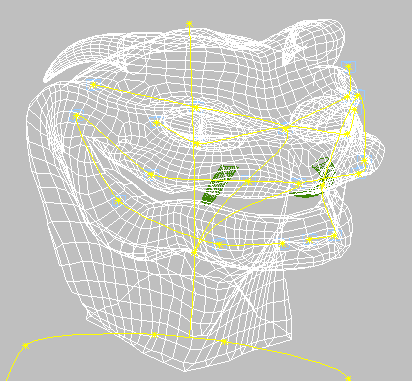
Splines used for detailed facial animation.
A common skeletal structure for the face includes:
In general, the lower lip bones should be linked to the jaw, and upper lip, jaw and eye bones should be linked to the main head bone.
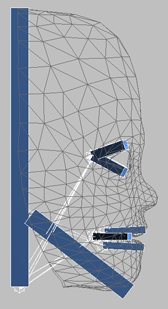
Facial bone linkage
If you use objects other than 3ds Max bones, you must create dummy objects at the end of each object used as a bone, and link each one to its corresponding bone before applying Physique. This is necessary because Physique extends links to the end of the second-to-last object in the hierarchy, not the last. In other words, if you don't create and link the dummy objects to the bones, Physique will not extend links to the ends of the bones.
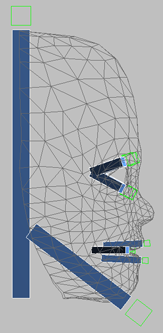
Dummy objects at ends of bones
Mesh objects that are to be animated along with the face, such as the eyes and hair, should not be linked to the bone structure until after Physique is applied. If you link them beforehand, Physique will treat them like bones. You can link these objects to the main head bone after you apply Physique.
There a two ways a setup like this could be used with a character body: The head could be attached to the body mesh, or it could be separate.
If possible, use a head that is separate from the body mesh. For human characters, this often works fine; most character animation doesn't provide a view of the underside of the neck, so your viewers will most likely never notice that they're separated. If you use a separate head, it will be easier to control the facial animation.
If you use a separate head, apply Physique to the head mesh alone. Click Attach to Node and pick the main head bone. Check the links to make sure they extend to the ends of the bones. Then, link the main head bone to the biped head.
If the character's head is connected to the mesh, link the main head bone to the biped head before applying Physique. Alternately, you can use the biped's head as the main head bone, linking the facial bones directly to the biped's head. When you apply Physique and click Attach to Node, pick the biped's COM as usual.
After applying Physique to the head or the entire structure, you can adjust envelopes and vertex assignments for the facial bones as you would for any biped bone.
Animating the Facial Structure
After you apply Physique to the structure, you can animate it by rotating or moving bones. 3ds Maxmanipulators are useful for setting up a custom user interface for bone animation.
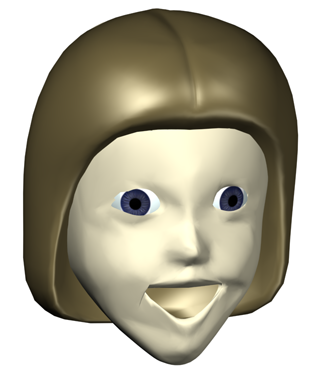

Facial expressions animated with Physique and facial bones.
You can perform lip synch animation by loading a sound track in Track View. By scrubbing the time slider, you can locate a sound and keyframe the dummies to appropriate positions.
To isolate lip vertices from influence by inappropriate links:
When working with a complicated facial bone structure, envelopes for the lower lip are bound to affect vertices in the upper lip, and vice versa. In general, this can be corrected in at the Vertex sub-object level:
 Select the head. On the
  Modify panel, go to the Vertex sub-object level.
 Region-select vertices of the upper lip, and click Remove From Link.