The Matte/Shadow material allows you to make whole objects (or any subsets of faces) into matte objects that reveal the current background color or Environment map.
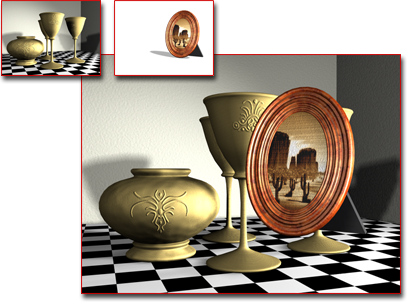
Simply rendering the framed photo against a background shows the photo in front of the background.
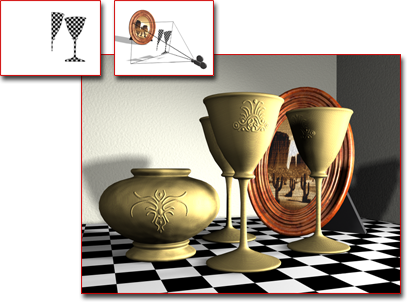
A matte object hides parts of the photo, revealing the background to make it appear the photo is behind the goblets.
It can also receive shadows cast on it from non-matte objects in the scene. Using this technique, you can cast shadows on backgrounds by building matte proxy objects and placing them in front of similarly shaped objects in the background.
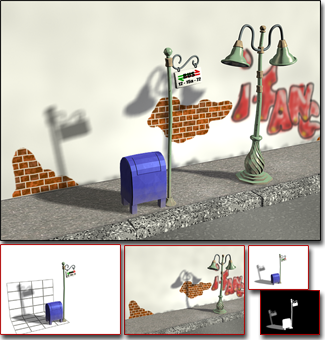
Creating a matte object for casting shadows against a background image
Matte/Shadow materials can also have reflections.
To render objects seamlessly against a background environment:
There are three ways you can render objects to blend seamlessly into a background environment:
Use the Plate Match/MAX R2.5 antialiasing whenever you are trying to match foreground objects with an unfiltered background, or trying to match the antialiasing qualities of the 3ds Max 2.5 renderer. See Plate Match Filtering.
Example: To see the effect of Affect Alpha and Matte Reflection:
 (Display Alpha Channel).
The objects all appear as white silhouettes, including the platform.
The silhouette of the box no longer appears, but the other objects and their shadows appear.
 Assign To Faces With ID and leave the value set to 1.
The reflections of the objects appear on the box, even though the box itself is invisible.
These options determine whether fog effects are applied to the matte surfaces, and how they are applied.
Turns the fogging of matte objects on and off.
When applying fog, you can choose between two different methods. You can either apply fog as if the matte surface is at an infinite distance from the camera or you can apply it as if the matte surface is actually at that point on the object being shaded. In other words, you can apply the fog to the matte surface in either 2D or 3D. The following controls determine how this is applied:
This is the 2D method. The scanline renderer fogs the scene, and then renders its shadows. In this case, the shadows won't be lightened by the fog. If you want to lighten the shadows, you need to turn up the shadow brightness.
This is the 3D method. The renderer first renders the shadows, and then fogs the scene. Since this varies the amount of fog over the 3D matte surface, the generated matte/alpha channels don't blend perfectly into the background. Use At Object Depth when the matte object is meant to be a 3D object in the scene that the 2D background represents.
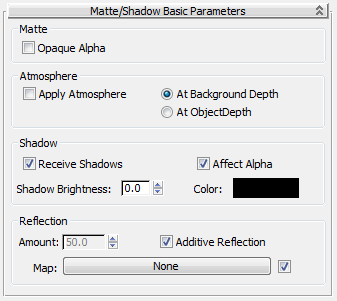
This group determines whether the matte surfaces receive shadows that are cast upon them, and how they receive them.
When on, shadows cast on a matte material are applied to the alpha channel. This lets you render bitmaps with alpha channels that you can composite later. Default=on.
Affect Alpha is available only when Opaque Alpha (in the Matte group box) is turned off.
When Affect Alpha is on, the higher the Shadow Brightness value, the more transparent the shadow, allowing the background to show through more, and making the shadow appear brighter.
Displays a Color Selector to let you choose the color of the shadow. Default=black.
Setting shadow color is especially useful when you're using a Matte/Shadow material to composite your shadows against a background image, such as video. It lets you tint your shadows to match pre-existing shadows in the image.
Controls in this group determine whether the matte surfaces can have reflections. You create matte reflections using a shadow map.
Click to assign a Reflection map. The reflection is independent of the scene’s Environment map unless you choose a Reflect/Refract map or Flat Mirror map.


