 Command entry: Point-Of-View (POV) viewport label menu
  Extended Viewports Material Explorer Material (lower) panel
The main window of the Material Explorer lower Material panel can contain several columns with information about the currently selected material. Some kinds of columns contain editable cells.
Right-Click Menu for Column Labels
When you right-click the label of a column in the Material Explorer lower panel, 3ds Max opens a menu that has several options to control column display:
Also, you can cycle through these options by clicking the column label.
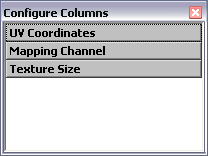
This opens the Configure Columns dialog.
The new column is inserted to the left of the existing column.
To remove a column from the table:
To sort the list based on a column or columns:
This performs a single-level sort based on the column contents, in ascending order, as indicated by an up arrow on the right side of the label. For example, clicking the Name column label sorts the table in ASCII order, starting with punctuation, then numbers, then letters.
Alternatively, right-click a column label and choose Sort Ascending or Sort Descending. You can sort any number of different columns this way to perform a multi-level sort.
Shows the names of materials, maps, and sub-materials. You can edit cells in this column: click a cell, then click or drag on it again to highlight text, and type a new name for the material or map.
For 2D maps, cells in this column correspond to the Mapping List on the Coordinates rollout for 2D maps. You can edit these cells: Click the cell to open a drop-down list that lets you choose among mapping types.
For materials and 3D procedural maps, the cells in this column show “None.”
For 2D and 3D maps, cells in this column show the Map Channel value. You can edit cells in this column: Click a cell, then drag across the value. While the value is highlighted, you can type a new Map Channel value, or you can click the spinner arrows that appear in the cell to change the Map Channel value. (You can also drag on the spinner’s up-arrow or down-arrow button to change the value more rapidly.)
For 3D procedural maps, the Mapping Channel value doesn’t appear unless the Coordinates Source value is set to Explicit Mapping Channel. See Coordinates Rollout (3D).


