Command entry:Unwrap UVW modifier
  Edit UVs rollout Open UV Editor button Edit UVWs dialog Tools menu Stitch Selected
Command entry:Unwrap UVW modifier Edit UVs rollout Open UV Editor button Edit UVWs dialog Stitch rollout
Edit UVs rollout Open UV Editor button Edit UVWs dialog Tools menu Stitch Selected
Command entry:Unwrap UVW modifier Edit UVs rollout Open UV Editor button Edit UVWs dialog Stitch rollout  Stitch Settings button (on Stitch: Custom flyout)
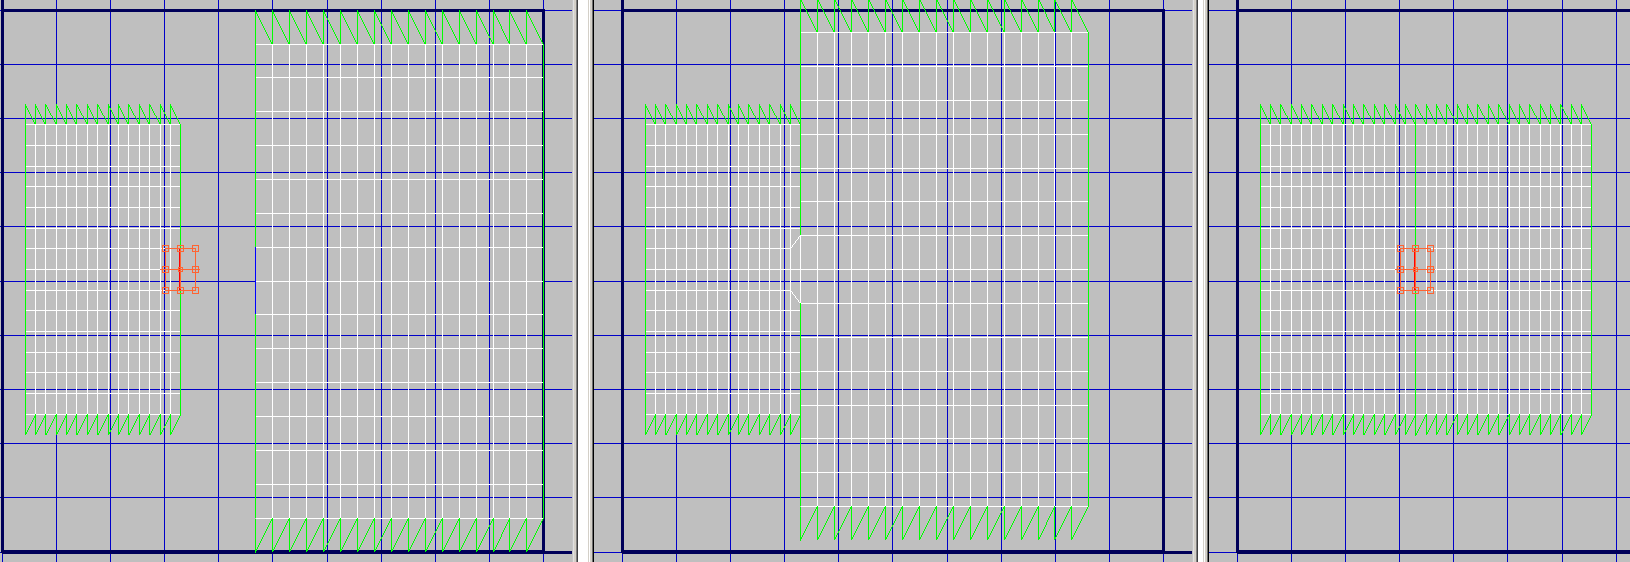
After you've separated your object's UVW coordinates into clusters, either manually or using one of the automatic tools on the Mapping menu, you can use the Stitch tool to recombine specific clusters by merging corresponding edges.
To stitch two clusters together:
By default, this causes the shared edges to highlight in the “target” object(s).

When Scale Clusters is off, Bias sets the extent to which attached sub-objects are moved from their original positions. At Bias=0, the sub-objects remain in their original positions in the source cluster. At Bias=1, sub-objects remain in their original positions in the target cluster. At in-between settings, their positions are averaged between the two.
When Scale Clusters is on, Bias sets where 3ds Max derives the scaling of the target cluster(s). At Bias=0, the scale is fully derived from the stitched edges on the source. At Bias=1, the scale is fully derived from the stitched edges on the target. At in-between settings, the scaling is averaged between the two.