A position constraint causes an object to follow the position of an object or the weighted average position of several objects.
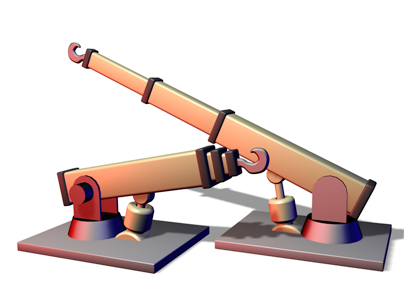
Position constraints align the elements of the robot assembly.
In order to activate, a position constraint requires an object and a target object. Once assigned the object becomes constrained to the target object’s position. Animating the target’s position causes the constrained object to follow.
Each target has a weight value defining its influence. A value of 0 is equal to off. Any value greater than 0 will cause the target to influence the constrained object. Weight values can be animated to create effects such as a ball being picked up from a table.
Multiple Targets and Weighting
A constrained object can be influenced by several target objects. When using multiple targets, each target has a weight value that defines the degree by which it influences the constrained object, relative to other targets.
Using Weight is meaningful (and available) only with multiple targets. A value of 0 means the target has no influence. Any value greater than 0 causes the target to influence the constrained object relative to other targets' Weight settings. For example, a target with a Weight value of 80 will have twice the influence of a target with a Weight value of 40.
For example, if a sphere is Position-constrained between two targets and each target’s weight value is 100, the sphere will maintain an equal distance between both targets even when they are in motion. If one of the weight values is 0 and the other is 50, then the sphere is influenced only by the target with the higher value.
To assign a Position constraint:
 Select the object you want to constrain.
 Constraints Position Constraint.
To access the Position constraint’s parameters through the Motion panel:
Select the Position-constrained object.
 Motion panel, on the Position list, double-click Position Constraint.
The Position constraint parameters are located under the Position Constraint rollout.
Select the constrained object.
Motion panel, on the Position list, double-click Position Constraint.
The Position constraint parameters are located under the Position Constraint rollout.
Select the constrained object.
Motion panel, on the Position list, double-click Position Constraint.
The Position constraint parameters are located under the Position Constraint rollout.
 (Auto Key).
Example: To assign a Position constraint with two targets and editing weights:
Select the box, assign a Position constraint, and click the sphere as the target.
Click to select the box, assign a Position constraint, and click the cylinder as the target.
The box is now position-constrained between the two targets.
 move the sphere around.
As the sphere moves, the box maintains an equal distance between the sphere and the cylinder. This is because the weight values for both targets are equal. By default the values are 1.00. If the sphere had a higher weight value than the cylinder, the sphere would influence the box more than the cylinder.
select the box.
Motion panel and view the Position Constraint rollout.
select the cylinder and move it around.
select the sphere and move it around.
The sphere has more influence over the box’s movement than the cylinder.
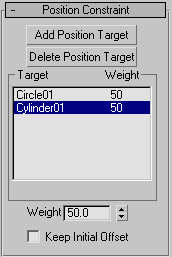
Once you assign a Position constraint, you can access its properties on the Position Constraint rollout in the Motion panel. In this rollout you can add or delete targets, assign weighting, and animate each target's weight value.


